Search This Blog

Showing posts with label hearts. Show all posts

31 May 2022

Stay Wild Hanging Heart

Earlier this year I downloaded the Copper Tiger digital paper set by Digital Curio (via Creative Fabrica).  


I plan to do a series of tiger-themed crafts throughout the year to celebrate the Year of the Tiger.  I finally sat down a couple of weeks ago to make this hanging heart idea that I had.


I have used the paper set exclusively.  The only extras I used were the gem for the flower centres and the letter dies that I used to make the words.  You could also use a digital cutting machine to cut the letters.  Apart from the slightly wonky lady, I really like how it turned out ☺.

PROCESS

  • Prepare the heart base.  I used 4 layers cut from old cereal boxes and glued together.
  • Choose one of the papers for the background.  Print it out and trace around the heart base, then cut it out and glue onto the heart.
  • Go around the edge of the heart with a sanding block (optional).
  • Print out a couple of the leafy papers and fussy cut a variety of leaves.  I cut nine leaves. 
  • Print out the art deco style black and gold paper and cut 5 of the fan shapes.
  • Print the lady and the sitting tiger clip art making sure to resize them to match the size of the heart base and cut them out.
  • Use the uppercase die set to cut the letters S, T, A, Y from the copper textured paper.
  • Use the lowercase die set to cut the letters w, i, l, d, from one of the tiger skin paper.
  • Position the lady and the tiger towards the centre of the heart.  It doesn't matter if the tiger overhangs the edge a little bit.
  • Position the lettering in the top right of the heart.
  • Add one of the smaller leaves underneath the words as a flourish.
  • In the top left corner use the art deco style elements to create a flower.  Glue them down around a central point leaving the edges free.
  • Add a gem in a coordinating colour to the centre of the flower you created.
  • Arrange a few of the leaves around the flower, slotting them in behind the petals.
  • Add some string or other fixing method to the back of the heart.

SUPPLIES

23 February 2022

Heart Flower Collage

14 days of hearts - no. 6

I had some background papers leftover from this project so I decided to make something similar, but on a heart base.  I used a 100mm canvas board heart that I had lying around, but you could use any other type of heart substrate or glue several die cut hearts together to make a strong base.


PROCESS

  • Cover the heart in glue and then add strips of old book pages or newsprint background paper making sure to glue down any overlapping edges.
  • When dry paint lightly over the surface with white acrylic paint using a dry brush.  The aim is to soften the appearance of the text, but not to completely obscure it.
  • Using a dry brush again, paint around the edge of the heart with black paint.
  • Cut about 16 pointed ovals (petals), each about 1-inch long, from coloured patterned paper.
  • Use a hole punch or cut a small circle from scrap card.
  • Glue the (petals) around the circle to create a flower shape.  
  • Cut several smaller petals from the same coloured patterned paper and glue those around the centre of the flower. 
  • Add additional petals in the gaps between petals (optional) to fill out the flower.
  • For the stamens cut thin strips about 1/2 inch long from yellow patterned paper.
  • Glue them around the centre of the flower (tweezers would be very useful here!).
  • Use a hole punch or cut a small circle from the yellow patterned paper and glue that to the very centre of the flower.
  • Glue the completed flower to the canvas base.
  • Cut 3 leaf shapes about 1 1/2 inches long from green patterned paper and slot them in behind the flower.


SUPPLIES:


22 February 2022

Geometric Watercolour Heart - Metallics on Black

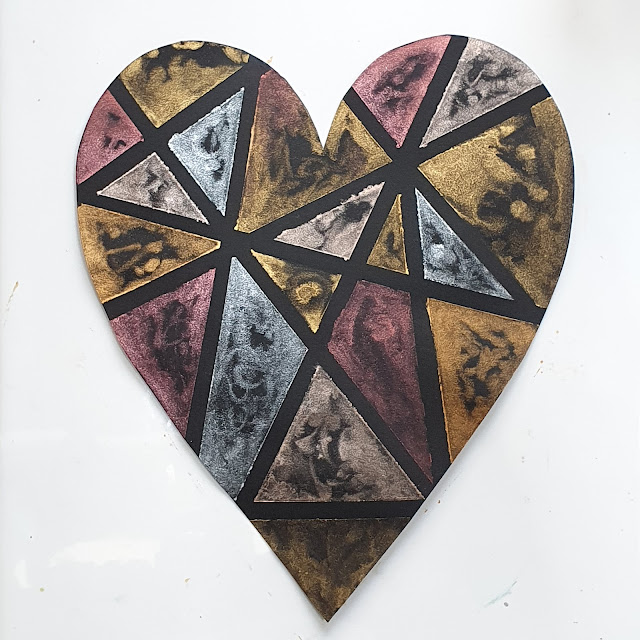
In my last post I painted a geometric watercolour heart with metallic watercolours.  I wanted to see what the finished result would look like if I used black card instead of white.  

I used exactly the same method, but as I didn't have black watercolour card I used plain crafting card.  I also decided to stick with purely metallic shades - gold, silver, aztec gold and copper.


As the card was not watercolour card the paint didn't flow in the same way as it would have with watercolour card.  I'm not sure if I like it 😄.  Perhaps I'd like it more with solid, even coverage 🤷🏾‍♀️.

As the method is exactly the same, take a look at this post for step-by-step instructions.

SUPPLIES

  • Black card (black watercolour card if you can get it)
  • Metallic watercolour paint (I used Arteza metallic watercolours.  At the time of writing they were not available in the UK, but were available in the USA.  For the UK check Craftstash and Cass Art for alternatives).

17 February 2022

Geometric Watercolour Heart

14 days of hearts - no. 4

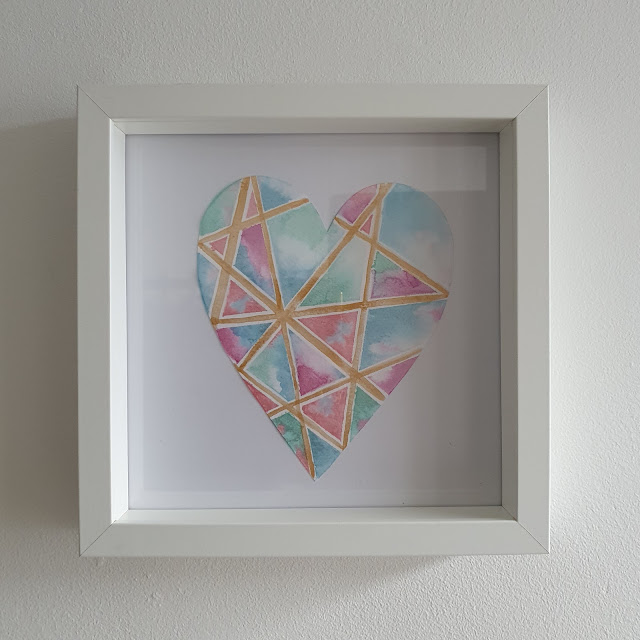
My ScanNCut is being tempremental so I've forgone any cutting for today's heart.  I've pulled out my Arteza metallic watercolour paints to create this pretty geometric heart.  The colours I used were Cactus Green, Sky Blue, Plum Purple and Watermelon Pink.


  • Cut a heart from watercolour card.
  • Cut lengths of masking tape into thin strips.
  • Arrange the strips onto the watercolour card to create a geometric pattern
  • Wet the entire surface of the heart.
  • Drop colour into the sections allowing the colour to flow.  You might need to re-wet the surface if sections have dried.
  • For more of a watercolour effect don't completely cover the sections with paint.  You can also add more than one colour to a section and let them blend together.
  • Let the paint dry (use a heat tool to speed up the process).
  • Carefully remove the tape.
  • You could leave the heart at this point, but if you like, paint over the newly revealed white channels with gold paint.
  • Let the paint dry.
  • Place in a frame and hang as wall art.  It would also make a nice gift.


Watch the process video:


SUPPLIES

  • Watercolour card - I used Crafter's Companion 300gsm watercolour card.
  • Metallic watercolour paint - I used Arteza metallic watercolours but these are currently not available in the UK.  At time of writing this they are available in the USA.  Alternatively Altenew also do a metallic watercolour set. Also check Craftstash and Cass Art for alternatives.
  • Masking tape

16 February 2022

Filigree Heart

14 Days of Hearts - No.3

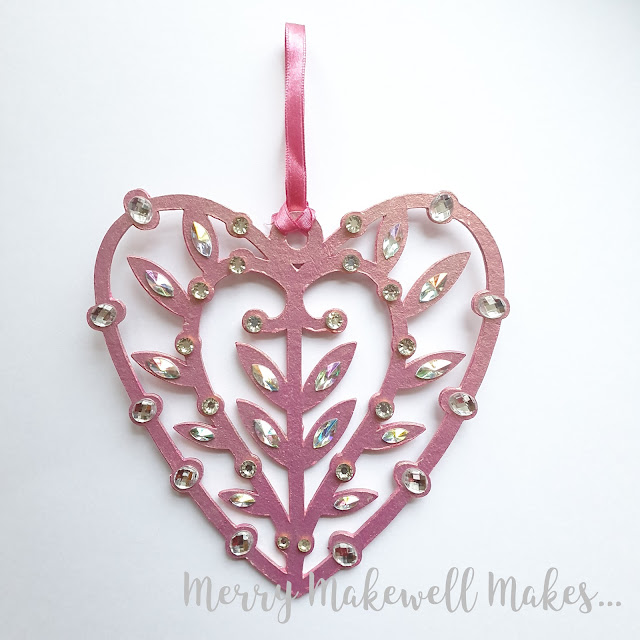
I saw this pair of hearts, designed by Nic Squirrell and thought that they would work really well with gems or pearls on the round elements of the design.

Two Filigree Hearts SVG Cut Files


I used the heart on the left and made a slight modification in Canvas Workspace to add a little hanging loop to the top.

  • Add the file to your cutting machine software and set the desired height.  I chose 150mm.
  • Cut four layers from cardstock and glue them together.  This will give a sturdy structure.
  • Paint the stack.  I used "Glowing Peach" iridescent acrylic paint by Arteza.  (It has a pinkish base with gold shimmer.  The colour changes depending on the angle from which you view it.)  I painted both sides, but that is optional.
  • Once the paint is dry glue a selection of gems to the various corresponding elements in the paper cut.  I used horse eye, round and oval gems.
  • Add a ribbon or string to the hanging loop.


Process video (short):


Supplies


15 February 2022

Rolled Paper Flower Heart

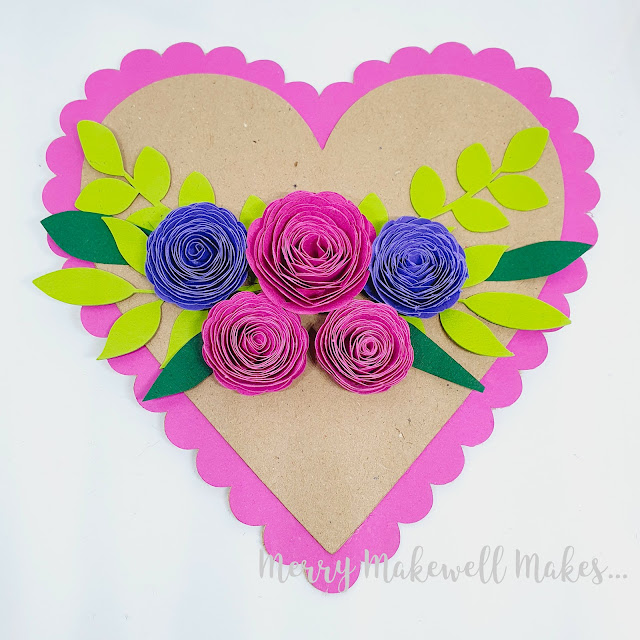
For the second heart in the 14 Hearts series, I decided to keep it simple with just a few rolled paper flowers and some foliage.  I really like the combination of bright colours with Kraft, so that was the colour scheme I chose.


  • Cut 2 scalloped hearts (145mm) from Kraft card and one from pink card.
  • Glue together.
  • Cut 2 hearts (125mm) from Kraft card and glue together.
  • Glue the smaller heart to the scalloped heart.
  • Cut 3 rolled paper flowers with the heart-shaped petals from pink paper.  (I used 135gsm. The large flower was set to130mm width and the smaller flowers were set to 100mm width.)
  • Cut 2 rolled paper flowers from purple paper (I set the size to 100mm width).
  • Cut various types of foliage from green card. Use different shades for added interest.
  • Make the flowers 
    • start from the outside and roll towards the centre
    • Keeping a loose hold of the top and bottom of the rolled flower allow it to unfurl a little.
    • Add glue to the end of the flower and hold it firmly against the bottom of the flower (use hot flue for quicker adhesion).
  • Glue the foliage down.
  • Glue the flowers down starting with the large pink flower at the centre and arranging the smaller flowers around it.

Process video (short):


Supplies

Heart/Scalloped heart cut files - pre-installed on Brother ScanNCut
Kraft Card
Coloured Card

14 February 2022

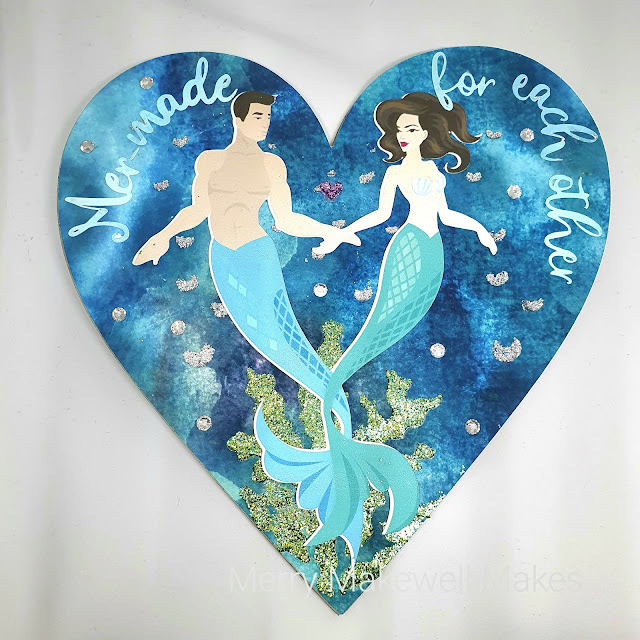
Mer-made for Each Other

Happy Valentine's Day 💝.  

I thought it would be fun to do 14 days of love by making 14 hearts, starting today with this punny heart.


PREPARATION
  • Download items from the supplies list below.
  • Import the mercouple clip art (the artwork comes both coloured and black and white) into graphics program and resize to fit a 150mm x 150mm heart (my couple were 125mm tall).  Then printed that out.
  • The download includes jpg, png and svg formats.  Import the svg into Canvas Workspace and isolate the outer line only and export that to cut out the clip art. 

  • Scan the print layout of the mercouple into the ScanNCut (I really love that feature!), then line up the outline and cut out the couple.
  • Using the pre-installed shapes on the ScanNCut cut four (4) 150mm hearts from 0.6mm greyboard, and one (1) heart from patterned paper printed from the Serene Digital Waters collection.
  • I created the text (Mer-made for each other) in Canvas Workspace and used the "Fit to Path" function to get the text to curve around the top of the heart.
  • Cut the text from patterned card printed from the Serene Waters Digital Textures pack.
  • Cut out the Seaweed Stencil, resized to 200mm x 200mm from thick (Kraft) card.
ASSEMBLY
  • Glue the 4 greyboard hearts together.  This will give a nice, rigid base.
  • Glue the patterned paper heart to the top of the greyboard stack.  (Leave to dry under something heavy so it doesn't warp.)
  • Mix three green shades of Aladine Izink Diamond Paint (turquoise, dark green and light green) and then pass that through the stencil at the bottom of the heart. (I chose to mix the colours but that is optional.)
  • Use silver Diamond Paint through the stencil to create bubbles.
  • Leave to dry, then glue the mercouple to the centre of the heart.
  •  Glue the text around the curve top of the heart.
  • Add some clear acrylic gems randomly across the heart.
  • Add a small heart between the couple. (I used Diamond Paint in pink.  If making this again I would make the heart bigger). 
  • Go over the mercouple's tails with a clear glitter pen so that they are glistening. (I didn't do that until after I'd taken the photo, but I like how it looks.)

Check out the process video:


Supplies:
Alafyou Swirly Font (download free as part of the Huge Font Bundle until 25/02/2022)
Acrylic gems

10 December 2021

DIY Hanging Hearts - No Craft Supplies Required!

Back in March I released a Skillshare class about crafting with digital supplies.  The class is about making use of digital supplies to create physical items - in this case hanging hearts for home décor.  

I made a few samples, but I just realised that I haven't shared them on the blog!  I used old cereal boxes for the heart base, and the background and embellishments are items that I downloaded, printed and cut out.  

This was the prototype that I made when I was feeling out the idea for the class:


I wanted to show how the same basic ingredients could be used to produce different results, so this was an alternative arrangement that I designed:

I also had the idea to make the butterfly a real statement, so in this example I put it front and centre surrounded by the flowers and foliage to give a wreath-like effect.


For the final example I wanted to use a different papers from the sets that I used to make the hearts.  I also wanted to show a slightly different way to use the elements and still achieve a nice result.


The only supplies used were old cereal boxes, printer paper, scissors and glue.  All of the digital resources that I used in the class are available to download for free!


Free Mixed Media Painted Butterflies

Free Rose Gold Floral Sprays

Free Fantasy Watercolor Digital Paper Set

If you want to find out more, head over to Skillshare and check out the class here.  If you aren't a member you can get a free 14-day Premium membership trial which will allow you to watch this class and hundreds of others.  While you're there, take a look at my Easel Card class as well.

19 March 2021

New Skillshare Class - An Introduction To Digital Crafting

If you're at all familiar with this blog, you'll know that I have a bit of a hoarding problem when it comes to art and craft supplies! This also applies to digital products.  I have literally hundreds of digital papers, textures, clipart, fonts and cut files.  

I was looking for a way to use some of my extensive collection of digital assets in real life and not just leave them languishing in cyberspace.  But then it occurred to me that there might be people like me who might be looking for ideas about how to use their digital products and thus this class was born!  It's also a perfect introduction to crafting for those who might want to give crafting a try, but don't have any supplies.

Skillshare Class - An Introduction to Digital Crafting


In this class you will learn:
  • where to find digital resources that you can download (for free)
  • how to combine the printed digital elements to create a beautiful piece of home décor.
PLUS
  • a bonus mini class on how to create your own floral embellishments
There's no need for stamps or dies or inks or patterned papers.  The only supplies needed are:
  • a computer
  • a printer
  • copy paper
  • heavier weight printer (photo) paper
  • scissors
  • glue
  • and a pencil.  
This class is suitable for all levels.  Whether you're a complete beginner, a seasoned crafter looking for something new, or someone looking for ideas about how to use your own collection of digital artwork, I'm sure you will take something from this class.  

Head over to Skillshare to watch the class. You'll need a Premium Membership to watch the whole class, but if you're not a member yet you can sign up for a 14-day free trial.

If you want to craft along with me, these are the resources that I use during the class:

Free Watercolor Jewel Tone Papers

Free Mixed Media Painted Butterflies

Free Rose Gold Floral Sprays

Free Fantasy Watercolor Digital Paper Set

Note that you may need to create an account to download some of the resources. 

03 February 2021

Rhinestone Heart Mandala

Recently I've seen a lot of mandala dot art on Pinterest and Instagram and I really like it.  So I started a Dot Art Pinterest board for inspiration and took a couple of classes about it that I found on Skillshare.  I was just about ready to give it a go, but then while tidying up my craft stash I came across some acrylic rhinestones and gems that have been sitting around for a very long time.  I bought them about four years ago planning to create lots of sparkly Christmas decorations, but, as is so often the case with me, I didn't do anything with them.  Anyway, I thought why not use them to create a mandala instead of the paint?  So I did and this is the result.  😍


Rhinestone heart mandala - Merry Makewell Makes
Rhinestone heart mandala close-up - Merry Makewell Makes

I was so eager to get started that I didn't map the mandala out first.  I basically stuck the large gem in the middle (approximately) and then played around with the design as I went.  At least I had the good sense not to glue down the rhinestones until after I was happy with their placement, but because I was designing it on the fly it took much longer than it probably would have if I'd mapped it out first.   I also might have gone a teeny bit overboard with the decoration, but then again can you really have too much sparkle?  No. No you can't.  Overall, I'm very happy with how it turned out.

As I was working on the design I noticed a few gaps in my rhinestone collection - I wanted more teardrops and horse eyes (the pointed ovals) and more of a gradation in size, so of course I went and ordered a bucket load more! 😄  Surprisingly I haven't found many references to rhinestone mandalas online, which is kind of surprising considering how pretty they are.  But I guess that just means that I'll have to create some more myself!

In case you're interested here are the mandala Skillshare classes (if you aren't already a member you can get 14 days of free Premium membership):

Learn Beautiful Dot Painting - Mandala Design

Dot Mandala for Beginners

Mini Dot Mandala

The third class has a good lesson on designing a mandala.  

19 October 2020

Quick and Easy Hanging Heart

If you've read my last couple of posts you'll know that I now have a LOT of die cut flowers in my stash.  I don't really have any plans for them, but it would be a shame to leave them bagged up and in a box somewhere.  So I made up a quick and easy hanging heart to display a few of them.


  • I cut out the heart from old cereal boxes (I used a Sizzix Framelits heart die).  [Incidentally, 4 or 5 layers of cereal box weight card glued together makes a good, rigid base comparable to chipboard or lightweight MDF.]  
  • I painted the background using cerulean blue and titanium white acrylic paint (I used a stencil brush for the clouds).
  • I chose a selection of flowers and arranged them at the bottom of the heart. (I used a selection from my many Tattered Lace 3D decoupage flowers - Bell Flower, Hydrangea, Blossom and Bloemen Primula).
  • I added a butterfly in the top left corner (downloaded from thehungryjpeg.com).
  • To finish I attached some twine to the back with hot glue as a hanger.
Simple, but very sweet.


21 July 2018

Quick and Easy Hanging Heart

This post contains affiliate links.

My friend came to me a few days ago to ask for my help to make a last minute teacher gift.  She requested a hanging heart that said "Athrawes gorau" (Best Teacher in Welsh) and personalised with the teacher's name and her son's name and featuring the colour purple.  


To make the heart I cut five hearts from white 300gsm cardstock, and one from Kraft card.  I punched holes in each of the curves at the top of the heart then stuck all the layers together using PVA glue 
with the Kraft heart at the back.  (I used my ScanNCut to cut the hearts but a die would also work.  If you don't have a die cutter or cutting machine I recommend using a square or a rectangle.)  To prevent the stack from warping I put it under a heavy stack of books as it dried.  When dry it feels very sturdy - like chipboard.

Meanwhile I found some pretty digital background paper and in a graphics program I used the heart template as a guide to place the text before cutting it out with the ScanNCut and sticking it to the top of the heart stack.  Incidentally the fonts that I used for the teacher's name and the sentiment are Old Emma Decorative and King Basil (which I love).

To finish I printed out some flower and leaf graphics, cut them out and added them to the heart.  It's not very clear from the photograph, but I printed three of each flower, cut each one gradually smaller than the last and then layered them up to add some dimension and make them more interesting.  I threaded some thick string through the holes to create the hanger.

Download free floral graphics here and here.

18 July 2018

L'amour est la cle

When it comes to craft supplies I'm a hoarder.  I can't bear to part with the smallest scraps of paper or a bit of ribbon that came with a gift or some old cardboard that could be used for some project or other.  So in an attempt to destash I decided to make a heart wall hanging out of old cereal boxes that I've been putting aside for a while.  


I made a large heart template on a piece of A5 card and then traced around that on the large panels of the cereal box.   After cutting them out (4 of them) and punching holes so that the finished piece could be hung, I stuck the 4 hearts together to get a thick, chipboard type of effect.  I also used the heart template to cut a heart from a piece of woodgrain effect paper.  NOTE - I suggest placing the heart stack underneath something heavy to prevent it from warping as the glue dries.

I cut the flowers with my ScanNCut using a pattern that I designed myself and coloured them using Spectrum Noir alcohol markers, before layering them together.  The leaves came from another die set.  I also used some Katy Sue Flower Soft for the flower centres. 

I gave the padlock die cut the same treatment as the hanging heart in that I layered up several die cuts - 5 from plain white card and one from gold mirror card - to get some dimension.  I then went over the front and sides with copper gilding wax to take away the white edges. 

The lettering was die cut using Sizzix Brush Alphabet dies and then I added a few freehand hearts to finish it all off.  I decided to go with French as it was a present for my (French) friend's mother.  To finish it off I used some thick string, which gave it a bit of a rustic feel.

In case you're interested in any of the supplies that I used:

*affiliate link