Search This Blog

23 February 2022

Heart Flower Collage

14 days of hearts - no. 6

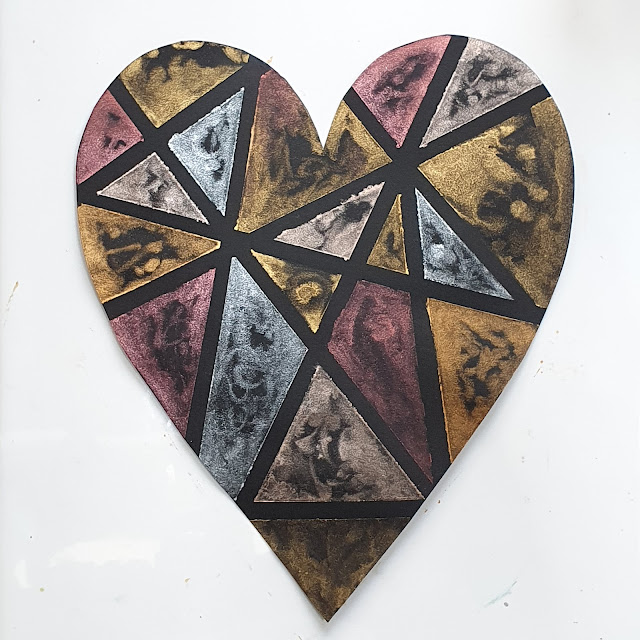
I had some background papers leftover from this project so I decided to make something similar, but on a heart base.  I used a 100mm canvas board heart that I had lying around, but you could use any other type of heart substrate or glue several die cut hearts together to make a strong base.


PROCESS

  • Cover the heart in glue and then add strips of old book pages or newsprint background paper making sure to glue down any overlapping edges.
  • When dry paint lightly over the surface with white acrylic paint using a dry brush.  The aim is to soften the appearance of the text, but not to completely obscure it.
  • Using a dry brush again, paint around the edge of the heart with black paint.
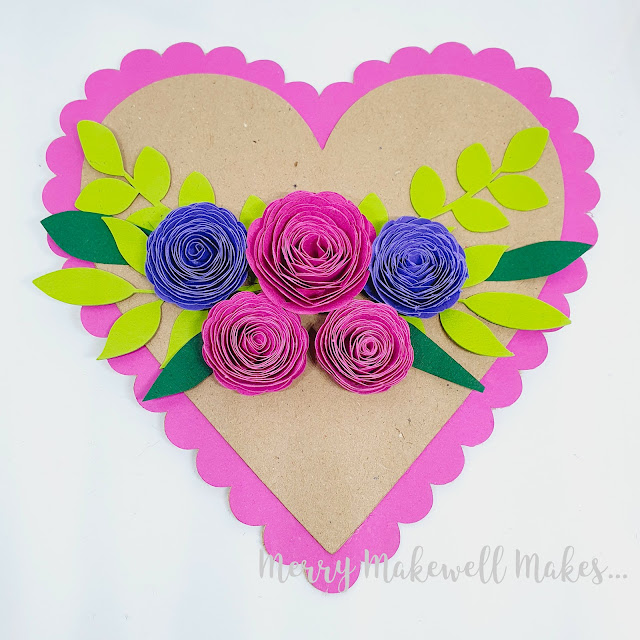
  • Cut about 16 pointed ovals (petals), each about 1-inch long, from coloured patterned paper.
  • Use a hole punch or cut a small circle from scrap card.
  • Glue the (petals) around the circle to create a flower shape.  
  • Cut several smaller petals from the same coloured patterned paper and glue those around the centre of the flower. 
  • Add additional petals in the gaps between petals (optional) to fill out the flower.
  • For the stamens cut thin strips about 1/2 inch long from yellow patterned paper.
  • Glue them around the centre of the flower (tweezers would be very useful here!).
  • Use a hole punch or cut a small circle from the yellow patterned paper and glue that to the very centre of the flower.
  • Glue the completed flower to the canvas base.
  • Cut 3 leaf shapes about 1 1/2 inches long from green patterned paper and slot them in behind the flower.


SUPPLIES:


22 February 2022

Geometric Watercolour Heart - Metallics on Black

In my last post I painted a geometric watercolour heart with metallic watercolours.  I wanted to see what the finished result would look like if I used black card instead of white.  

I used exactly the same method, but as I didn't have black watercolour card I used plain crafting card.  I also decided to stick with purely metallic shades - gold, silver, aztec gold and copper.


As the card was not watercolour card the paint didn't flow in the same way as it would have with watercolour card.  I'm not sure if I like it 😄.  Perhaps I'd like it more with solid, even coverage 🤷🏾‍♀️.

As the method is exactly the same, take a look at this post for step-by-step instructions.

SUPPLIES

  • Black card (black watercolour card if you can get it)
  • Metallic watercolour paint (I used Arteza metallic watercolours.  At the time of writing they were not available in the UK, but were available in the USA.  For the UK check Craftstash and Cass Art for alternatives).

17 February 2022

Geometric Watercolour Heart

14 days of hearts - no. 4

My ScanNCut is being tempremental so I've forgone any cutting for today's heart.  I've pulled out my Arteza metallic watercolour paints to create this pretty geometric heart.  The colours I used were Cactus Green, Sky Blue, Plum Purple and Watermelon Pink.


  • Cut a heart from watercolour card.
  • Cut lengths of masking tape into thin strips.
  • Arrange the strips onto the watercolour card to create a geometric pattern
  • Wet the entire surface of the heart.
  • Drop colour into the sections allowing the colour to flow.  You might need to re-wet the surface if sections have dried.
  • For more of a watercolour effect don't completely cover the sections with paint.  You can also add more than one colour to a section and let them blend together.
  • Let the paint dry (use a heat tool to speed up the process).
  • Carefully remove the tape.
  • You could leave the heart at this point, but if you like, paint over the newly revealed white channels with gold paint.
  • Let the paint dry.
  • Place in a frame and hang as wall art.  It would also make a nice gift.


Watch the process video:


SUPPLIES

  • Watercolour card - I used Crafter's Companion 300gsm watercolour card.
  • Metallic watercolour paint - I used Arteza metallic watercolours but these are currently not available in the UK.  At time of writing this they are available in the USA.  Alternatively Altenew also do a metallic watercolour set. Also check Craftstash and Cass Art for alternatives.
  • Masking tape

16 February 2022

Filigree Heart

14 Days of Hearts - No.3

I saw this pair of hearts, designed by Nic Squirrell and thought that they would work really well with gems or pearls on the round elements of the design.

Two Filigree Hearts SVG Cut Files


I used the heart on the left and made a slight modification in Canvas Workspace to add a little hanging loop to the top.

  • Add the file to your cutting machine software and set the desired height.  I chose 150mm.
  • Cut four layers from cardstock and glue them together.  This will give a sturdy structure.
  • Paint the stack.  I used "Glowing Peach" iridescent acrylic paint by Arteza.  (It has a pinkish base with gold shimmer.  The colour changes depending on the angle from which you view it.)  I painted both sides, but that is optional.
  • Once the paint is dry glue a selection of gems to the various corresponding elements in the paper cut.  I used horse eye, round and oval gems.
  • Add a ribbon or string to the hanging loop.


Process video (short):


Supplies


15 February 2022

Rolled Paper Flower Heart

For the second heart in the 14 Hearts series, I decided to keep it simple with just a few rolled paper flowers and some foliage.  I really like the combination of bright colours with Kraft, so that was the colour scheme I chose.


  • Cut 2 scalloped hearts (145mm) from Kraft card and one from pink card.
  • Glue together.
  • Cut 2 hearts (125mm) from Kraft card and glue together.
  • Glue the smaller heart to the scalloped heart.
  • Cut 3 rolled paper flowers with the heart-shaped petals from pink paper.  (I used 135gsm. The large flower was set to130mm width and the smaller flowers were set to 100mm width.)
  • Cut 2 rolled paper flowers from purple paper (I set the size to 100mm width).
  • Cut various types of foliage from green card. Use different shades for added interest.
  • Make the flowers 
    • start from the outside and roll towards the centre
    • Keeping a loose hold of the top and bottom of the rolled flower allow it to unfurl a little.
    • Add glue to the end of the flower and hold it firmly against the bottom of the flower (use hot flue for quicker adhesion).
  • Glue the foliage down.
  • Glue the flowers down starting with the large pink flower at the centre and arranging the smaller flowers around it.

Process video (short):


Supplies

Heart/Scalloped heart cut files - pre-installed on Brother ScanNCut
Kraft Card
Coloured Card

14 February 2022

Mer-made for Each Other

Happy Valentine's Day 💝.  

I thought it would be fun to do 14 days of love by making 14 hearts, starting today with this punny heart.


PREPARATION
  • Download items from the supplies list below.
  • Import the mercouple clip art (the artwork comes both coloured and black and white) into graphics program and resize to fit a 150mm x 150mm heart (my couple were 125mm tall).  Then printed that out.
  • The download includes jpg, png and svg formats.  Import the svg into Canvas Workspace and isolate the outer line only and export that to cut out the clip art. 

  • Scan the print layout of the mercouple into the ScanNCut (I really love that feature!), then line up the outline and cut out the couple.
  • Using the pre-installed shapes on the ScanNCut cut four (4) 150mm hearts from 0.6mm greyboard, and one (1) heart from patterned paper printed from the Serene Digital Waters collection.
  • I created the text (Mer-made for each other) in Canvas Workspace and used the "Fit to Path" function to get the text to curve around the top of the heart.
  • Cut the text from patterned card printed from the Serene Waters Digital Textures pack.
  • Cut out the Seaweed Stencil, resized to 200mm x 200mm from thick (Kraft) card.
ASSEMBLY
  • Glue the 4 greyboard hearts together.  This will give a nice, rigid base.
  • Glue the patterned paper heart to the top of the greyboard stack.  (Leave to dry under something heavy so it doesn't warp.)
  • Mix three green shades of Aladine Izink Diamond Paint (turquoise, dark green and light green) and then pass that through the stencil at the bottom of the heart. (I chose to mix the colours but that is optional.)
  • Use silver Diamond Paint through the stencil to create bubbles.
  • Leave to dry, then glue the mercouple to the centre of the heart.
  •  Glue the text around the curve top of the heart.
  • Add some clear acrylic gems randomly across the heart.
  • Add a small heart between the couple. (I used Diamond Paint in pink.  If making this again I would make the heart bigger). 
  • Go over the mercouple's tails with a clear glitter pen so that they are glistening. (I didn't do that until after I'd taken the photo, but I like how it looks.)

Check out the process video:


Supplies:
Alafyou Swirly Font (download free as part of the Huge Font Bundle until 25/02/2022)
Acrylic gems