Search This Blog

Showing posts with label backgrounds. Show all posts

31 March 2023

Friday Favourites

 Every Friday (more or less 😉) I bring you a graphic, a font and a cut file that I like.  Some will be free and some will be paid for, but all are items that I have downloaded or purchased myself.  

This week's graphic offering is a little bit different.  I came across this Photoshop Stamp Brush Bundle at Creative Fabrica and couldn't believe how much it contained 😲!  There are 136 stamp brush sets, totalling more than 5000 individual brushes!  For those without Photoshop, they also work with Affinity Designer and Affinity Photo.


 A stamp brush is basically a stamp.  Although it is called a brush, you don't paint or draw with it. Rather you stamp individual images on to your canvas wherever the brush passes.  So this could be great for creating textured backgrounds and patterned papers for journals, scrapbooking, cardmaking, sublimation... Basically any crafty project.  At $12 (or included as part of the All Access Subscription) it's an absolute bargain.

I created this gorgeous, textured background using some of the brush sets in this bundle - namely the splash, foil and cracks sets. You can download this background for free here.   I may film a tutorial for creating a digital background like this soon, so consider subscribing to my YouTube channel to keep updated.  

Download this free textured background here

------------------------------------------------------------------------------------------------

This week's font is Rainbow from Creative Fabrica. It is a decorative typeface with 5 different styles - plain, stars, stripes, hearts and circles.  It's super cute and would be a good candidate for use with digital cutting machines.  

If you know your way around a graphics program like Affinity Designer, you could also isolate the outline of the letters to get a solid base for layered effects like I did with the last two examples.


------------------------------------------------------------------------------------------------

With Easter fast approaching, these Easter Egg Lanterns from Design Bundles would be a cute addition to your Easter decorating.  Do you decorate for Easter?  I don't specifically decorate for Easter, but I do like to have a lot of floral decorations around go celebrate Spring.  


And again, if you know how to modify SVGs, you could squish the tabs and replace with Christmas imagery to get decorative ball lanterns for the festive season.

Until next time...

09 August 2021

Glitter Background Floral Greetings Cards

Affiliate links used. If you follow a link and then make a purchase I will receive a commission at no additional cost to you. 
All of the products mentioned in this post are products that I have bought and paid for myself.

Hello!  Today I'm sharing a few cards that I have made by creating simple backgrounds with Aladine's Izink Gold Diamond Paint and some graphics from the Vanilla Blossom Watercolor Set from The Hungry Jpeg. 

In case you've never heard of it, Izink Diamond Paint is a glitter paste and paint in one.  Although you can apply it with a paintbrush it wouldn't really work for painting fine details.  It would work really well with stencils though.  I love that it is super sparkly and that the paint is not too wet like a lot of other glitter paints/glues.  I've purposely left the stripes and spots a little bit rough but it's up to you how neat and tidy they are.

The Vanilla Blossom Watercolor set has a number of elements including florals, foliage, butterflies and birds.  One of the florals had three complementary images that would work as decoupage.  


I filled an A4 sheet with the various images that I wanted to use and printed that out.  If you're going to try to decoupage remember to group all of the relevant images and resize them together.

I'm using sentiment strips that I created myself.  Check out this blog post to see how I made them.

Card 1

- Paint horizontal stripes across the card front and allow to dry.
- Cut out the three different floral images (flower with stem, flower with no stem and flower on its own).
- Layer the floral images using foam pads to create a 3D decoupage effect.
- Glue the decoupaged flower to the front of the card and add a sentiment.
Floral card with horizontal gold glitter stripe background


Card 2

- Paint horizontal stripes across the card front and allow to dry.
- Cut out one each of the flower with stem, and the flower on its own and stick them together with foam pads.
- Rotate the card to landscape orientation so that the fold is at the top.
- Glue the floral to the left-hand side of the card front and add a sentiment.


Card 3

- Use a saucer, bowl or similar to paint curved stripes across the card front and allow to dry.
- Cut one each of the flower with stem, flower and leaves with no stem, flower on its own and a butterfly.
- Layer the flowers with foam pads and glue it in the bottom right corner of the card front.
- Glue the butterfly in the top left corner (ish) and add a sentiment.
Floral card with gold glitter curved stripe background


Card 4

- Paint rough circles about 1.5cm / ⅝ inch onto the card front and leave to dry.
- Cut out two of the flower with leaves, one flower on its own and a butterfly.
- Decoupage one of the flowers with leaves and the flower on its own with foam pads.
- Arrange the flowers toward the centre of the card and glue them down.
- Add a butterfly (I chose the top left corner) and add a sentiment.


Use a black card blank for an alternative look.

I really like the gold, but the diamond paint comes in a few different colours so it could be fun to try out different card and paint combinations as well as different florals, or even multicoloured glitter paint backgrounds.

Watch the process video:


SUPPLIES


19 July 2018

Freebie Finds - Free Graphics and Fonts

This post contains some affiliate links (denoted by *). If you follow the link and subsequently make a purchase, I will earn a commission.

Welcome to my weekly(ish) round-up of font and graphic freebies floating around the web right now.  If you're into digital crafting or creating digital art then these free resources are worth seeking out.  Most come with commercial licences so that you can create products to sell, whether they be print-on-demand patterns and designs or to create physical craft products, but be quick as they are generally only available for a limited time.


Creative Fabrica have just released a brand new free graphic bundle*, featuring 16 graphic packs including watercolour florals, cute cat illustrations, various SVG cutting files and more.  It's definitely worth taking a look at.  


Free Graphic Bundle Vol 5 | creativefabrica.com


This Street Scene Builder* would be perfect for 'New Home' greeting cards.  Adjust the scale and colours to create your own unique urban landscape artwork.
Street Scene Builder | creativefabrica.com


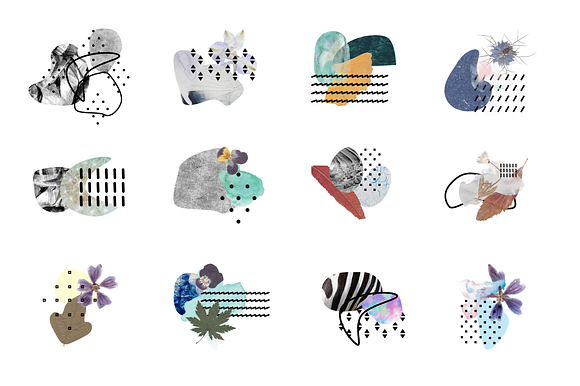
Over at Creative Market I'm loving 'Contemporary Graphic Huge Set Vol.1'.  It's a bumper set of 100 graphic elements that can be combined in any way you like to create abstract designs that could be used to create framed artwork, greetings cards, background papers, t-shirt designs and so on.  
Contemporary Graphic Huge Set Vol.1 - Illustrations
Contemporary Graphic Huge Set Vol 1 | creativemarket.com


At Design Cuts you can download 'Watercolor and Chalkboard Patterns, Vintage Papers and Textures' a set consisting of watercolour patterns, a chalkboard pattern, a marble pattern, vintage paper and a texture.  The great thing about the Design Cuts website is that they also provide a tutorial to give you some ideas about how to use the free designs.  


18 July 2018

L'amour est la cle

When it comes to craft supplies I'm a hoarder.  I can't bear to part with the smallest scraps of paper or a bit of ribbon that came with a gift or some old cardboard that could be used for some project or other.  So in an attempt to destash I decided to make a heart wall hanging out of old cereal boxes that I've been putting aside for a while.  


I made a large heart template on a piece of A5 card and then traced around that on the large panels of the cereal box.   After cutting them out (4 of them) and punching holes so that the finished piece could be hung, I stuck the 4 hearts together to get a thick, chipboard type of effect.  I also used the heart template to cut a heart from a piece of woodgrain effect paper.  NOTE - I suggest placing the heart stack underneath something heavy to prevent it from warping as the glue dries.

I cut the flowers with my ScanNCut using a pattern that I designed myself and coloured them using Spectrum Noir alcohol markers, before layering them together.  The leaves came from another die set.  I also used some Katy Sue Flower Soft for the flower centres. 

I gave the padlock die cut the same treatment as the hanging heart in that I layered up several die cuts - 5 from plain white card and one from gold mirror card - to get some dimension.  I then went over the front and sides with copper gilding wax to take away the white edges. 

The lettering was die cut using Sizzix Brush Alphabet dies and then I added a few freehand hearts to finish it all off.  I decided to go with French as it was a present for my (French) friend's mother.  To finish it off I used some thick string, which gave it a bit of a rustic feel.

In case you're interested in any of the supplies that I used:

*affiliate link

21 February 2018

Lovely Flowers - Free Printable

Over at Design Cuts the latest freebie of the week is Lovely Colors Flowers by Bloomart.


I used the free set to create an A6 card front, which would be perfect for Mother's Day which is right around the corner.  I created two versions - one with the sentiment "With Love" and one with no sentiment so that you can add your own touch with stamps, a die cut or whatever you fancy.  There is also an extra sheet of flowers with the bouquet separated into layers so that you could decoupage them if you wanted to.

To access the printables simply click on the images below.


A6 Lovely Flowers Printable - no sentiment

A6 Lovely Flowers Printable - with sentiment

A6 Lovely Flowers Printable - decoupage flowers

Download the free graphics over at Design Cuts - but hurry, the offer ends at midnight Thursday 22nd Feb (that's tomorrow!)

16 February 2018

Cocktails by Moonlight

When the Tattered Lace Art Deco Classics range came out I fell in love with the ladies in the Art Deco Cocktail Hour set.  I really like the seated lady and I had recently downloaded a set of space watercolour backgrounds from Creative Market (free download of the week at the time, currently 50% off) which made me think of having her sitting in the moon sipping her cocktail. A few gems and some small fabric stars completed the overall effect.  


This post does not contain affiliate links. 

14 February 2018

Choose Love - Free Printable

Happy Valentine's Day!  In honour of all things love and romance I created this poster as a reminder to always choose love.  Download the A4 poster here.


If you'd like to create your own projects you can get free downloads of the floral digital elements from here and this and 99 other wood backgrounds from here.

21 November 2017

Woodland Christmas

I've seen a few cards on Pinterest featuring a silver birch style background which I really liked.  So I bought myself a birch tree background cutting die and made my own version. I really like how it turned out.


I started with an A6 plain white card blank.

For the background I used Distress Stains in blocks of colour (from top to bottom: Chipped Sapphire, Wilted Violet+Broken China and Broken China).  I simply swiped the stain across the card in stripes, overlapping the colours in each block for a smoother transition.  Wilted Violet on its own was too purple, so went over the top of it with Broken China to get more of a blue hue.  I also dotted Chipped Sapphire across all three colour blocks in several places, which also helps to blend the colours.

I die cut the birch tree trunks from white card and lined the die cut up with the top and sides of the card over the coloured background.  The die cut did not reach all the way to the bottom so I cut a couple of snow mounds from white card and placed them at the bottom of the card, then went over them with a Spectrum Noir clear sparkle pen for a glistening snow effect.

The deer are from the Tattered Lace Family Outing die set.  I cut them from white card and coloured them using Spectrum Noir markers, going over the spots on their backs with a white gel pen.  I stuck the doe straight on to the card and used foam pads for the fawn.

At this point I decided to add some snowfall to the scene by dotting snowflakes onto the background using a white gel pen.

Finally, I stamped the sentiment into the corner.  The stamp I used is from a set that came with issue 35 of Creative Stamping magazine.

14 November 2017

Dream A Little Dream

Back in September I bought a lot of dies (A LOT!).  I'm slowly working my way through cutting them all and trying them out in projects.  I loved this tree panel die, but interestingly what I had in mind for it is nothing like what I ended up creating.


I found a pad of watercolour paper in Lidl for a steal (so of course I bought some) and then I set out to make a few interesting backgrounds for a different project.  I dabbed Distress Stains (Peeled Paint, Festive Berries, Broken China and a touch of Mustard Seed) onto an old mirror (in lieu of a craft sheet) then spritzed with water and painted random patches of colour on to the watercolour paper until the paper was covered.

At first I cut the tree panel in white and coloured it in with watercolour pencils, but I didn't really like it, so I cut it in black and mounted it onto the background I had created.  It looked so pretty and whimsical, so I put the whole thing on the front of a card and added a sentiment from an old stamp set.

I used a black mat for this card which really highlights the tree, but if I had used any of the colours from the background for the mat, that colour would be highlighted. For example a blue mat would have highlighted the blue in the background and so on.  (A little tip that I picked up from Mel Heaton on Create & Craft TV.)

22 April 2017

Three Looks, One Die

I love background dies and the Tattered Lace Grandma's Garden panel die is really pretty.  There are loads of techniques that are great with background dies, but here are three simple ways to use it.


1.  Cut it out of Kraft (or other coloured) card and affix to a white card blank.  Stick a die cut sentiment also cut from Kraft (or other coloured) card on to a white oval and then affix both on to the background with foam pads.  It's really simple but it looks great.


2.  Die cut a panel out of plain white cardstock and place it over a coloured background.  In this case I created a vibrant background using alcohol markers, but you can use inks, watercolours, pan pastels or whatever medium you like.  I placed a white die cut sentiment onto a piece of coordinating card stock.  The white against the vibrant background helps to tone it down.  This is a great technique to use with busy background papers too.


3.  Die cut a panel from plain white cardstock and colour in the different elements, then affix to a card blank.  In this case I used pastel shades and a Kraft card base.  The pastels and Kraft work really well together.


GHVHVDN131519882 

11 March 2017

Digital Geometric Shards

Remember the geometric pattern card that I created a few posts ago?  Well, I liked it so much that I decided to create a digital version of it using the CraftArtist2 Professional software.  I love the idea of creating products using my own designs so on a whim last year I opened up a shop on Society6 (it's called Merry Makewell Designs) and uploaded my digital rendition of the card design.  I originally tried to reproduce the card faithfully, but the combination of teal and purple didn't really work digitally for some reason, so I used a grey outline instead.  I also made a pastel version using a white outline.

Here they are as notebooks:
Purple Shards notebook

Pastel Shards - Notebook


 I've also added the design to a whole range of other products, like tote bags, phone cases, laptop sleeves, pouches, mugs, wall hangings and even shower curtains.  I think that they look pretty good.


If you have a chance go and take a closer look.

04 March 2017

Easy Watercolour Backgrounds

Watercolouring in card making is everywhere at the moment, so I dug out my set of Reeves Water Soluble Wax Pastels to have a go at creating some simple watercolour style backgrounds.  I simply scribbled pastels in similar shades onto a white card blank in vertical, horizontal and diagonal stripes, then used a wet paintbrush to go over the colours and blend them a little.

Hello Greetings Card - ombre watercolour background

Have a Beautiful Day greetings card - watercolour background with glitter blutterfly
I used ordinary cardstock for these so the colours did not move as much as if I had used watercolour card, but I quite like that effect.  The first butterfly was cut using Sizzix Thinlits die set Butterfly #3.  The second used an ArtC stencil with BoBunny glitter pastes.  It's much more lovely in real life.

I like the simplicity of these.  The watercolour effect is a great backdrop that doesn't really need much else to make an attractive card.  This would be a great technique for making men's cards; a bold sentiment and a well-chosen stamped image or die cut would be all you'd need.

18 February 2017

Geometric Shards

A little while ago I was helping my mum to clean out her garage and I came across a load of my old school books and folders.  One of the things that I used to love to do was to decorate the insides of the folders by sectioning the space into squares or triangles and then colouring them in.  I made this card shortly afterwards, inspired by that memory.


How are You? geometric pattern card


I used Spectrum Noir alcohol markers; BT5 using the chisel tip to create the outline and PL2, PL4, PL5, LV1 and LV3 to colour in the triangles.  I happened to have some card that matched the turquoise marker colour almost perfectly, which I used for the card base.  The sentiment is from an old sticker collection by American Crafts which has been in my stash for years!  I added the faux stitching around the perimeter to help it stand out more.  It just goes to show that you don't always need stamps, patterned papers and fancy dies to create a striking card.

15 January 2017

Hello!

It's been a while since I entered a cardmaking challenge or posted on the blog.  It seems appropriate to start off my comeback with a "Hello".


I got this gorgeous "hello" stamp as a freebie with a Docrafts Creativity magazine and it's been languishing in the bottom of my stamp stash for months.  I can't believe that I waited this long to use it, but now that it's made its debut I can see it being used a lot.

The background was made by flicking gold paint onto the card base.  The sentiment was stamped onto a card panel and heat embossed with gold.  I then made a rough outline of the sentiment panel with a gold pen and popped it up on the card base with foam tape.  Three gold gems, placed randomly finished off the card.

Today I'm entering the following challenges:


Daring Cardmakers (New), and
CAS-Ual Fridays (Gold)

24 October 2015

Wonderful Day

A few months ago I went a bit crazy in the Sizzix Spring clearance sale.  I love flowers so several of the items that I picked up were flower related including the Susan's Garden gazania die set.

I dug out some Luminarte silk acrylic glaze paints that had been languishing in the bottom of a drawer and started making backgrounds.  Then I cut the gazania from some beautiful foiled designer paper.

I really love the background. The colours work so well together and the flower matches perfectly.


The challenge on this week's Crafy Cardmakers is "Autumn colours". I think this really fits the bill.

29 September 2015

Furry Friends

It's been a while! I didn't mean to take so much time off. 

I'm joining in with the Wicked Wednesday ATC Challenge. The theme for the last week was "Furry Friends".

The background was one that I had made before (I like to make a few at a time).  The paw prints came from the docrafts Little Meow stamp set.  I also stamped some random feathers in pink & silver inks. 

The cat also came from the Little Meow stamp set.  She looked to me like she was looking at something so I added a little bird from another stamp/die set I have.  I wasn't sure what words to use so I just stamped "meow".


I felt like it needed a little something else so I added the dots and dashes border.  I tried to use puff paint for the dots to get some texture, which sort of worked.  It was my first time using it so I haven't quite gotten the hang of the technique.

14 July 2015

Pisces

I haven't played along with the Wicked Wednesday ATC Challenge for a while.  I just never seemed to get around to it.  But this week I made a point to get in on time! 

The theme this week is "Zodiac Signs".  I got a set of Tropical-themed stamps with last months "Creative Stamper" magazine and I chose the rather fabulous-looking fish for Pisces.  


The background is watercolour card that's been used to mop up excess paint.  I want over it with a fairly wet wash of Luminarte Acrylic Glaze in Azurite.  The fish was stamped and embossed in black and then coloured with alcohol markers and a white gel pen.  I used a bubbles stencil (homemade) to sponge on some white ink around the fish.  

The colours are more muted than I would have liked due to being coloured onto a darker background.  If I were to do it again I'd stamp first, mask off the fish, lay down the background and then colour. 

12 July 2015

Moroccan Inspired Cards

I bought the Sizzix Peacock* and Moroccan Flowers stamps + die sets recently and I love them. LOVE THEM! I also bought several of the Moroccan label dies. Although I really like them, I found myself struggling to come up with a decent layout, but thankfully I got there in the end.


First off I embossed a piece of red mirror card with my Xcut Moroccan Flower Tiles folder.  Then I cut a label with the Sizzix Tangier die and stuck that on top of the mirror card.  (I like the way the red shows through the decorative elements of the label.)  Then using one of the stamps fron the Peacock set I stamped and embossed the detail in red before cutting out the shape with the corresponding die.  The sentiment is attached to the centre of the label using foam pads.


The second card used another stamp from the Peacock collection.  I stamped a repeating pattern on the blank card using white ink then heat embossed with clear embossing powder.  I then used my inks to create the warm orange/yellow/red background.  To bring out the embossed detail I buffed those areas with a dry baby wipe, which removed any ink from the top.

The die cut was done with the Sizzix Arabesque Flower die using red mirror card again.  I used the same stamp/die/sentiment combi as before, but this time I embossed in gold. Again I used foam pads to adhere the sentiment.

I love how these cards turned out.  Both quite simple but really striking.  And so my love affair with the Sizzix Moroccan Collection dies & stamps goes on.

I'm entering the following challenges:
CAS-ual Fridays - Embossing
CAS on Sunday - #62 Embossing
Daring Cardmakers - No Black, No Neutrals
CAsology - Repeat

*I have used some affiliate links in this post.

02 June 2015

My First Shaker Card

This is a straight-up CASE of a card by Vicky Papaioannu..  I've never really felt compelled to make a shaker card, but I loved the softness and the diffused effect that using vellum gives, so I decided to give my own a go.


To start with I cut three rectangles 12.85cm x 8.5 cm from patterned paper, plain white card and vellum.  To make a frame I measured 1.5cm in from all sides on the back of the white rectangle and then cut the middle section out using a craft knife.  (I may use my Silhouette to make up a load of these rectangles and frames for future use, as I'm pretty rubbish with a craft knife and even this simple task was a bit of a pain!)


I stamped the image and sentiment onto the vellum using silver pigment ink and then covered that with silver embossing powder. Heat embossing happens quickly on vellum so keep the heat tool moving to avoid bubbling.  Then placing the embossed vellum face down, I attached double-sided foam tape around the four edges of the vellum, sprinkled in some sequins then placed the patterned paper rectangle on top (also face down).  And that's the shaker compartment done.

I had intended to use the same patterned paper as a mat for the shaker compartment, but forgot!  Instead I used a lovely bright blue paper, which matched the colour tones of the sequins.  So there you go - my first shaker card!  I don't think it'll be the last...

I'm entering this card into the Simon Says Stamp Wednesday Challenge and The Paper Players Tic Tac Toe challenge (any shade of blue / Embossing / Patterned paper).

20 May 2015

Spread Your Wings and Fly

The challenge this week on the Simon Says Stamp Wednesday Challenge is to use an inspiration colour swatch.


Isn't it delicious?  This combination of colours seems to be really popular at the moment, and rightly so because it's lovely.

Whenever I use paints, if there is any left over I brush it over watercolour paper to make backgrounds for future use.  It just so happens that some of the backgrounds matched this swatch beautifully.  So I stuck two of the watercoloured panels to a card front.  I recently bought a new stamp  - a butterfly surrounded by the words "Spread your wings and fly" and added small butterflies from the Hot Off The Press "Dressform" mini stamp set.  I added some gems in teal and light blue as butterfly trails, and then added a sentiment to the top left corner.  The edges are inked with a light pink pigment ink.