Search This Blog

Showing posts with label pretty paper. Show all posts

20 July 2022

Patchwork Cards 1 - Half-Rectangle Triangles

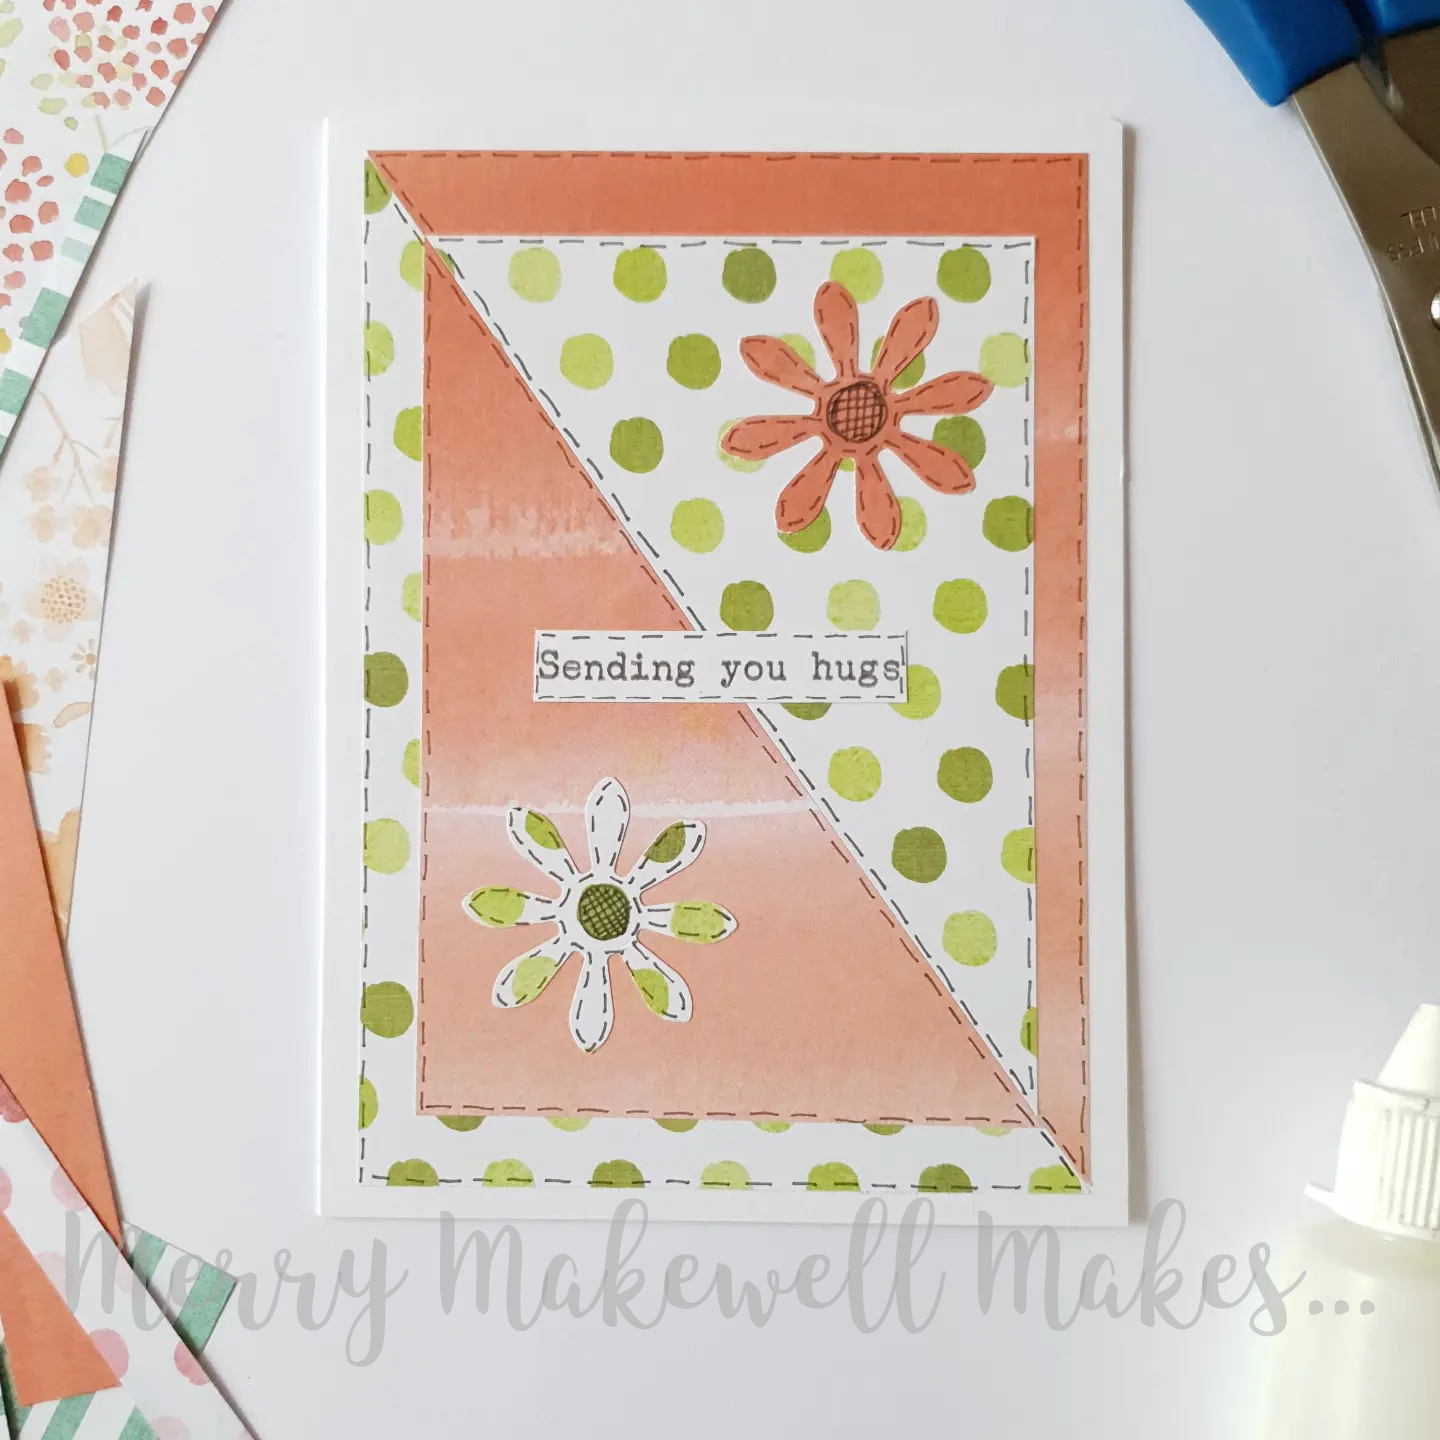
I was looking through some of my (extensive!) paper scraps and came across a card layout that I designed, but never tried.  I thought it would be fun to try it out and share it with you:


To make the card:
  • Trim an A6 card base to 14.5cm (i.e. 10.5 x 14.5cm).  (This step is optional.  I like to do it because it makes the borders around the patterned papers equal.)
  • Cut two rectangles each measuring 9.5 x 13.5 cm and 7.5 x 11.5cm from two contrasting patterned papers. You should have four rectangles in total.
  • Cut each of the rectangles in half across the diagonal. (If you have half-rectangle triangle dies you can just cut the triangles directly.)  Make sure to cut in the same direction on all four of the rectangles.  You should now have four large triangles and four smaller triangles (two each in two patterned papers).
  • Position one of the large triangles in one corner of the card base, leaving an even border around the top and side.  Take one of the large triangles with a different pattern and position it in the opposite corner of the card base.
  • Place a smaller triangle in the middle of a larger triangle so that you have two different patterned papers on top of each other.
  • Use a (black) fineliner to add faux stitching around all the edges. 
  • Cut two flowers (or other shape) - one from each patterned paper and add faux stitching all around the edges. 
  • Glue the flowers (or other shape) towards the right-angled corner of the smaller triangles. You can shape the flowers and only stick down the centres or you can glue them down flat.  It's up to you!
  • Add a sentiment at the centre.
I made some additional cards with slight variations of the same layout by changing the position of the smaller triangle and the shape of the card base.

Variation 1 - Smaller triangles meeting at the centre diagonal. Also flowers are stuck down flat (more like applique).

Variation 2 - Card in landscape orientation and the corners of the smaller triangles are aligned with the corners of the larger triangles.  Also no faux stitching.

Variation 3 - Square card base, smaller triangles meeting along the diagonal (as in variation 1) and alternative faux stitch pattern on the flowers.

Variation 4 - Square card base, smaller triangles meeting along the diagonal and alternative shape used for the embellishment.

Watch the process video:


SUPPLIES
  • A6 card blank
  • Two types of patterned paper in contrasting colours.
  • Scissors / Trimmer / Guillotine
  • Glue
  • (Black) Fineliner pen  <0.3mm

19 April 2017

Bloom and Grow - Free Backing Papers

I love the idea of designing my own backing papers, so, with a little help from Daisytrail and CraftArtist 2 Professional, I did just that.  I used the Bright Blooms free digikit to create a set of 6 x A4 backing papers in soft shades, perfect for Spring.


As the true test of a backing paper is its usability, I had fun being my own design team and made a set of cards to show the papers off.  They work really nicely together.  Download the papers and use them in your own projects, then leave a link to your creations in the comments ðŸ˜Š.


04 May 2015

Home Sweet Home


A couple of weeks ago on Create and Craft TV I watched a programme about Stampbord, which I'd never heard of before.  The demonstrator made a lovely night scene as though looking through a window.  Just by layering inks and stamping and creating texture, she produced a really lovely piece of art.  It took a lot of willpower not to buy up every piece of Stampbord on the show (those people really know what they're doing!).  I really wanted to have a go, and then I remembered that I had quite a bit of greyboard left over from a previous impulse buy.

Now, I'm a creative person, but I wouldn't call myself artistic.  As I've found since starting cardmaking, composition is a real skill.  So it was with some hesitation that I cut the board down to size and prepared to get started on my first mixed media masterpiece.


I used three pieces about 9 x 6.5cm (roughly 3.5 x 2.5in).  I covered them in patterned paper  and then painted the backs with white gesso.  I also applied a  thin layer of gesso over the top of the papers to mute the colours a little.  I then stamped and embossed the word "HOME" in purple on two pieces, then wrote  "Sweet" with a Versamarker (my new favourite thing!) and embossed that in blue.  I stamped then embossed a couple of bird silhouettes on the HOME panels,  On all three panels I used a flower and foliage stamp with silver ink, then over-stamped the flowers in a different colour.  I didn't like the way that it looked so I painted over the silver ink with Moss Green Luminarte Silk Acrylic Glaze.  Then I attached a few flowers made from air-drying clay and ran purple organza ribbon along the back to hold the three panels together and make a hanging loop.


It's quite pretty and I like the way it turned out, but it is very basic.  Having seen a few mixed media tutorials since making my wall hanging, I see that I could have gone much further with creating the backgrounds and layering, but then that's what learning is all about.  I've still got a lot of greyboard left, and I'm already thinking about my next project...

15 November 2014

Pretty Paper

TK Maxx might seem like an unlikely place to shop for craft and stationery supplies, but it's worth checking out every now and again.  From gorgeous notebooks to paper pads and embellishment packs there are some surprisingly good deals to be had.  Much of the crafty stuff is imported from America and not widely available here so even better value.  My best haul so far was a 180-sheet 12x12 paper pad by Recollections that I snapped up for just £7.99.  

But my latest find (which I L❤VE) hails from these shores; a 2015 calendar by Hammond Gower from their Lace collection.  It's a gorgeous fusion of Kraft card with pops of colour. Love, love, love it! The calendar doesn't actually appear on their website but it looks like it's made up of a collection of their greetings cards. I'll be a happy bunny on New Year's Day when I get to put it up.  Here are some of my favourite months.