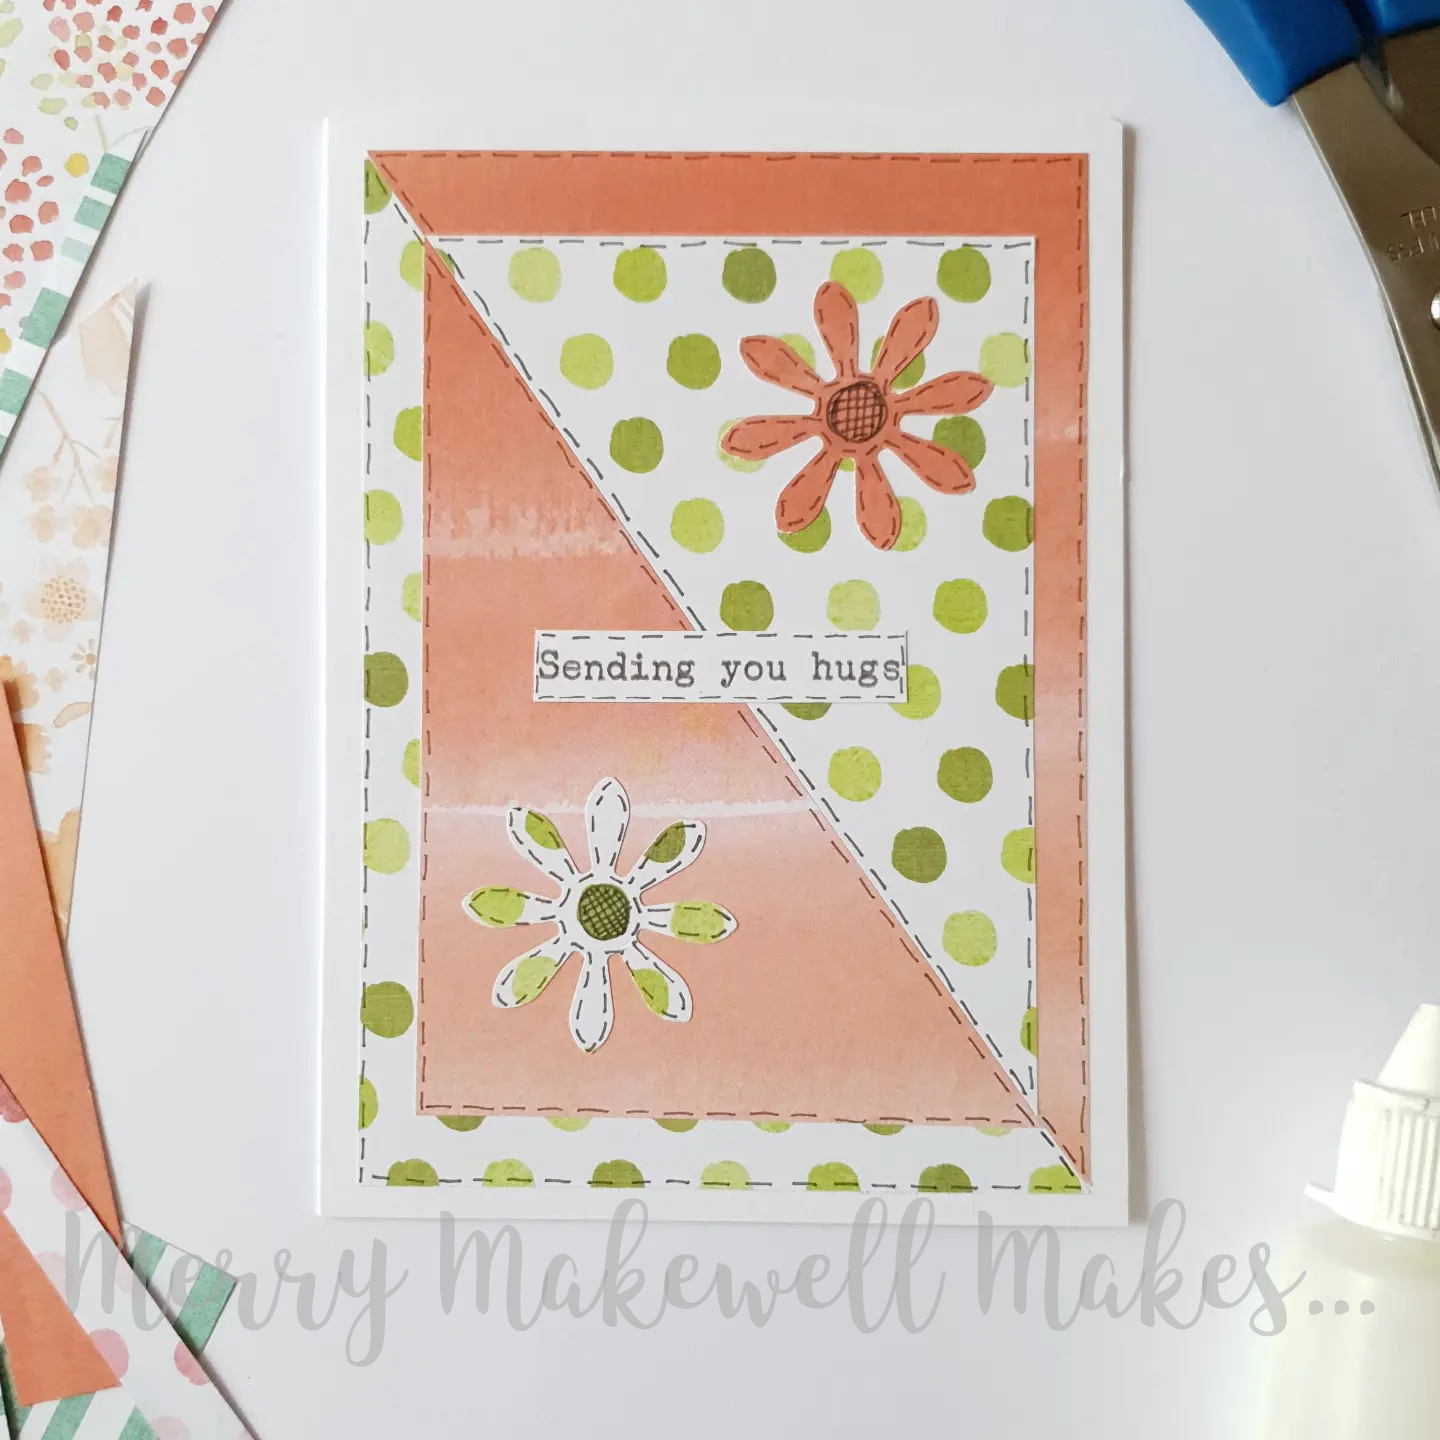
I was looking through some of my (extensive!) paper scraps and came across a card layout that I designed, but never tried. I thought it would be fun to try it out and share it with you:
To make the card:
Trim an A6 card base to 14.5cm (i.e. 10.5 x 14.5cm). (This step is optional. I like to do it because it makes the borders around the patterned papers equal.)
Cut two rectangles each measuring 9.5 x 13.5 cm and 7.5 x 11.5cm from two contrasting patterned papers. You should have four rectangles in total.
Cut each of the rectangles in half across the diagonal. (If you have half-rectangle triangle dies you can just cut the triangles directly.) Make sure to cut in the same direction on all four of the rectangles. You should now have four large triangles and four smaller triangles (two each in two patterned papers).
Position one of the large triangles in one corner of the card base, leaving an even border around the top and side. Take one of the large triangles with a different pattern and position it in the opposite corner of the card base.
Place a smaller triangle in the middle of a larger triangle so that you have two different patterned papers on top of each other.
Use a (black) fineliner to add faux stitching around all the edges.
Cut two flowers (or other shape) - one from each patterned paper and add faux stitching all around the edges.
Glue the flowers (or other shape) towards the right-angled corner of the smaller triangles. You can shape the flowers and only stick down the centres or you can glue them down flat. It's up to you!
Add a sentiment at the centre.
I made some additional cards with slight variations of the same layout by changing the position of the smaller triangle and the shape of the card base.
Variation 1 - Smaller triangles meeting at the centre diagonal. Also flowers are stuck down flat (more like applique).
Variation 2 - Card in landscape orientation and the corners of the smaller triangles are aligned with the corners of the larger triangles. Also no faux stitching.
Variation 3 - Square card base, smaller triangles meeting along the diagonal (as in variation 1) and alternative faux stitch pattern on the flowers.
Variation 4 - Square card base, smaller triangles meeting along the diagonal and alternative shape used for the embellishment.
Watch the process video:
SUPPLIES
A6 card blank
Two types of patterned paper in contrasting colours.
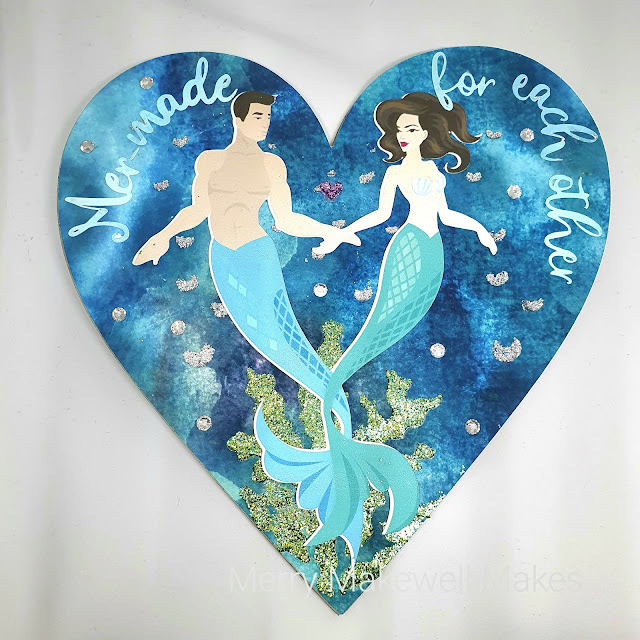
I thought it would be fun to do 14 days of love by making 14 hearts, starting today with this punny heart.
PREPARATION
Download items from the supplies list below.
Import the mercouple clip art (the artwork comes both coloured and black and white) into graphics program and resize to fit a 150mm x 150mm heart (my couple were 125mm tall). Then printed that out.
The download includes jpg, png and svg formats. Import the svg into Canvas Workspace and isolate the outer line only and export that to cut out the clip art.
Scan the print layout of the mercouple into the ScanNCut (I really love that feature!), then line up the outline and cut out the couple.
Using the pre-installed shapes on the ScanNCut cut four (4) 150mm hearts from 0.6mm greyboard, and one (1) heart from patterned paper printed from the Serene Digital Waters collection.
I created the text (Mer-made for each other) in Canvas Workspace and used the "Fit to Path" function to get the text to curve around the top of the heart.
Cut the text from patterned card printed from the Serene Waters Digital Textures pack.
Cut out the Seaweed Stencil, resized to 200mm x 200mm from thick (Kraft) card.
ASSEMBLY
Glue the 4 greyboard hearts together. This will give a nice, rigid base.
Glue the patterned paper heart to the top of the greyboard stack. (Leave to dry under something heavy so it doesn't warp.)
Mix three green shades of Aladine Izink Diamond Paint (turquoise, dark green and light green) and then pass that through the stencil at the bottom of the heart. (I chose to mix the colours but that is optional.)
Use silver Diamond Paint through the stencil to create bubbles.
Leave to dry, then glue the mercouple to the centre of the heart.
Glue the text around the curve top of the heart.
Add some clear acrylic gems randomly across the heart.
Add a small heart between the couple. (I used Diamond Paint in pink. If making this again I would make the heart bigger).
Go over the mercouple's tails with a clear glitter pen so that they are glistening. (I didn't do that until after I'd taken the photo, but I like how it looks.)
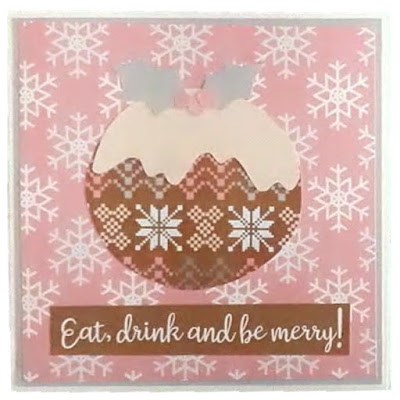
On the back of one of the brown patterned papers draw around a circular-ish shape and then cut it out. This will be the Christmas Pudding.
On a piece of contrasting card (I chose plain beige) use the pudding shape to draw and cut out a half circle.
Cut along the bottom edge of the half circle to create the effect of dripping frosting and then glue that to the pudding shape.
On another piece of coloured cardstock (I used grey picked from one of the patterned papers) draw two holly leaf shapes and cut them out.
Cut or punch three small circles from the plain pink cardstock for berries.
Cut a square from the pink snowflake patterned paper to 13 x 13cm
Glue the pudding, holly leaves and berries to the patterned paper, leaving enough room below for a sentiment.
Glue the sentiment in place.
Cut a square from the grey cardstock to 13.5 x 13.5cm and glue the pudding and pink patterned paper on top of it leaving an even, narrow border all around.
I recently downloaded the Nordic Winter Christmas Backgrounds digital paper set. I wanted to do a 10 cards 1 paper pack for this set, but I don't think that I'll have time to get that all done. So I'm going to post about each card as I go rather than waiting for all the cards to be completed.
Nordic Christmas Digital Paper Set by Green Light Ideas (via CreativeFabrica.com)
To flesh out the paper pack I used the colour picker tool in my graphics program on the patterned paper to create some solid-colour coordinating cardstock in pink, brown, grey, beige and blue. I also made some generic Christmas sentiments using the brown background. Take a look at this post to find out create your own sentiment strips.
To make the card:
Draw (or print) a template for a Christmas jumper (sweater) onto plain white card, trace around it on the reverse of the patterned papers and then cut it out.
Trace around just the neck, cuffs and bottom of the jumper on plain white card, cut them out and glue them into place.
The card blank is 10.5 x 14.5cm.
Cut a piece of 10 x 14cm printed brown cardstock and glue to the card blank.
Cut a piece of 9.5 x 13.5cm blue and grey argyle patterned paper and layer on top of the brown card.
Glue the jumper (sweater) to the front of the card. Use foam tape for added dimension (optional).
Place a sentiment of your choosing below the jumper (sweater).
Some affiliate links used. If you follow a link and then make a purchase I will receive a commission at no additional cost to you.
All of the products mentioned in this post are products that I have bought and paid for myself.
Last year I did a 10 Cards 1 Kit post where I used a paper pack as my "kit". I like the idea of doing something similar and this Christmas-themed paper pack that I found at Creative Fabrica seemed like a good fit. I like the mix of colours and imagery and the potential to make a complete card kit from it.
To make up the card kit you could:
use a graphics program to separate the gingerbread, holly sprigs, candy and poinsettias into individual files to give a set of embellishments.
print the backing papers as is (in 12x12 format) or manipulate them in a graphics program to create a smaller scale repeat as the patterns are (more-or-less) seamless.
use the colour picker tool to create your own coordinating plain card for matting and layering.
create a sheet of generic sentiments (like in this blog post) for your card fronts or interiors.
bring in some other elements from your stash (like glitter, glitter card, mirror card, gems etc.) to add some pizzazz...
…and you've made your own card kit! I'll make a separate post (and maybe a video) with more details and the results, so stay tuned.
So, you've accumulated a load of patterned papers (either physical or digital), but you have no idea what to do with them. At least, that's a problem that I have. I'm not a prolific card maker, nor do I scrapbook, but I can't resist a pretty patterned paper or an interesting background texture. So what to do? Collage, that's what!
I tend to overthink things and spent ages trying to decide what to collage. In my mind I felt like it needed to be some grand, artistic piece. But it really didn't have to be so complicated. In the end I went with a simple floral layout inspired by an embroidery design.
I used papers from my digital stash, but any papers would work. This would actually be a great project for using up paper scraps. I chose a newsprint, a pink paper with a a slight texture for the flowers, two different green papers for the stems and leaves, yellow paper for the flower centres and a lovely bluey-purple paper for some berries. I've listed links to all the papers used at the end of the post.
Step-by-step
1. I printed out three sheets using one of the designs in the Old Newspaper Textures set. The original file is a 12 x 12 sheet and the text was quite large. So I resized it a couple of times to make the print smaller. I tore pieces from all three sheets and stuck them down on the canvas board trying to get a nice mix between the different text sizes.
2. Using the pink sheet I cut a strip about one inch wide and then cut about 30 petals shapes.
3. I arranged the petals on to the canvas board to create 3 flower heads.
4. I cut thin stems from one of the green papers and various sized leaves from the other green paper, then arranged them onto the board.
5. I cut a few small circles for berries from the blue-purple paper and three yellow circles for the flower centres and added them to the piece as well.
At this point the collage was finished, but I felt like it didn't stand out from the background enough. So I went around the edges of the petals, leaves and berries with my Derwent Inktense pencils to help lift the composition off the page. I think that I might have overworked it a bit, but it does seem to have done the job and I still like the end result. (Original on the left, "enhanced" on the right.)
A few months ago Design Bundles released a new freebie digital paper pack - the Summer Digital Papers Set: sixteen 12x12" papers with a (loose) summer theme. As soon as I saw the set I thought of Christmas even though it's labelled as "Summer" and one of the papers features watermelons! So I thought it would be fun to try a 10 cards 1 kit with the set, but with a Christmas theme. I also thought that it would make a great debut video for my YouTube channel. Alas, I didn't get around to editing it in time 😞.
OK, so I know that Christmas is long gone, but I'm posting this anyway because I went to all the trouble to make the cards and film the process and it seems like a bit of a waste not to. Besides, if you ignore the Christmas theme this could be great inspiration for how to use patterned papers for cards in general.
I did use some die cuts, stamps and card from my stash, but I tried to keep the "extras" to a minimum so that the cards could be recreated easily with whatever you have in your stash.
Card 1
I was struggling to get started so used Freshly Made Sketches 457 for inspiration. I used a Kraft card blank and four of the patterned papers and cut a stag head silhouette from Kraft card to match the base. The sentiment is stamped and heat embossed with white embossing powder.
The stag head could easily be replaced and the sentiment changed for a card for a different occasion.
Card 2
For this card I cut one of the green papers into a triangle for a tree and used the red paper to create presents. I also used pink glitter card as a mat to match the pink of the patterned backing paper and then cut 'tinsel' from the glitter card to decorate the tree. Acrylic gems for baubles and a simple sentiment stamped in green to match the colour scheme finish off the card. (If I were going to make this again, I'd make the presents slightly smaller.)
Card 3
For this card I embossed a piece of plain white card, slightly smaller than the card front. I cut strips of the triangular patterned paper and used them to create a frame around the embossed card. Then I cut three triangles for trees and a scalloped circle to frame the sentiment from different papers in the set. I added a few gems for an extra festive touch.
Card 4
Here I made rosettes of varying sizes from three of the patterned papers and used silver glitter glue to make them look like hanging ornaments. I stamped and heat embossed a sentiment onto a piece of one of the green papers. This design would also suit a birthday card or any celebration card.
Card 5
The striped patterned paper screamed "candy cane!" to me so I cut out two mirror images of candy cane shapes. (I didn't have a candy cane die so I drew a template and used that as my guide.) I die cut a bow from the the red paper and some pine sprigs from one of the green papers. The elements were arranged on a Kraft tag to match the card blank, and then I used the red gingham style paper as the background. I also added some silver string to the tag.
Card 6
For this card I die cut the pine sprigs from one of the green papers and die cut three circles from three of the patterned papers. I fussy cut various triangles from the patterned paper and arranged all the elements to make it look like baubles hanging from a tree. I cut a sentiment from pink glitter card to finish off the card.
Card 7
I kept things fairly simple for this card, cutting a stitched edge rectangle frame from Kraft card and a rectangle from the red patterned paper. I die cut a bird and a sentiment from plain white card and finished off the card with a few gems.
This could also be adapted for any other occasion by changing the sentiment and using a similar die or florals in place of the bird.
Card 8
This is one of my favourites. Pink isn't readily associated with Christmas, so to make the card more festive I stamped a snowflake-like motif in the centres of all the polka dots and heat embossed them with gold embossing powder. Then I layered rectangles of gold mirror card and the pink patterned paper as shown and die cut a sentiment and the stag head from gold mirror card as well. Again, this could easily be adapted for a different occasion.
Card 9
I had a lot of small paper pieces and offcuts left over so I decided to try some paper weaving. I embossed a piece of white card with the swirly pattern then die cut a bauble aperture from it and placed the woven paper behind the aperture. Then I die cut the bauble hanger from gold mirror card and pieced it back into the aperture. I also stamped two sentiments on circles which I covered with Glossy Accents. I was hoping to get a somewhat domed effect, but they turned out pretty flat. I added a few gems to finish.
Card 10
I left the red and black polka dot paper until last. I really struggled with how to use it because it didn't feel Christmassy to me. In the end I decided to use a layout that I've used a lot in the past and like. I cut a strip of black card to go across the card and a slightly smaller strip of the patterned paper to sit on top of it, then cut a stag silhouette and the sentiment from black card. The stag silhouette didn't pop out enough when directly on the patterned strip so I also cut a decorative oval from white card for it to sit on. I added a few gems on the white spaces for a bit of added interest. I'm still not sold on this colour scheme, but it was interesting to try.
EDIT - I did it! I finished the corresponding video and posted it to YouTube 🙌🙌
--------------------
This was a lot of fun and a great creative exercise! I was really pleased with the variety of different cards that I ended up with despite using limited resources. Why not challenge yourself to create 10 cards from 1 paper pack? Design Bundles have thousands of background papers as well as other graphic resources at very reasonable prices. It's a really cost-effective way of adding to your stash (provided that you have a decent printer), plus you'll never run out of your favourite design again!
If you're new to digital crafting or don't have much of a budget for craft supplies it's definitely worth checking out their freebies page, but remember to read the licence terms to make sure you don't violate any terms of use.
This post contains affiliate links. If you click the link and then make a purchase it won't cost you any more, but I will receive a commission.
Last weekend my youngest had a birthday party to go to. I decided to make a name plaque for the birthday boy. I know he likes football, but I wanted to go with something different. I had the Star Studded font in mind and so a space theme seemed like a good fit.
For all the components I glued 4 layers of 280gsm Kraft card together using PVA glue. When the glue dries the resulting stack is nice and stiff and has the feel of chipboard or MDF. I left them under something heavy while drying to prevent warping.
I started by creating the plaque base with my Brother Scan N Cut by welding rectangles and semi-circles together on the mat. Rough dimensions were 20 x 10 cm rectangle + 25 x 7.5 cm rectangle + 2 x semi-circles with 50mm diameter. Added 2 x 0.5cm holes at either end for hanging. I also printed out the space background from a digital download collection from Creative Fabrica and cut one plaque shape from that.
I then cut the letters and saved the starry waste to use as small embellishments. The actual font was a little more squat than I wanted so this is a slightly elongated version to fit the plaque better. I used silver acrylic paint to cover the letters and stars.
The moon and planet were from the library of files that come pre-loaded with the Scan N Cut machine. Again I used acrylic paint on those. Then it was simply a case of assembling the components.
When it comes to craft supplies I'm a hoarder. I can't bear to part with the smallest scraps of paper or a bit of ribbon that came with a gift or some old cardboard that could be used for some project or other. So in an attempt to destash I decided to make a heart wall hanging out of old cereal boxes that I've been putting aside for a while.
I made a large heart template on a piece of A5 card and then traced around that on the large panels of the cereal box. After cutting them out (4 of them) and punching holes so that the finished piece could be hung, I stuck the 4 hearts together to get a thick, chipboard type of effect. I also used the heart template to cut a heart from a piece of woodgrain effect paper. NOTE - I suggest placing the heart stack underneath something heavy to prevent it from warping as the glue dries.
I cut the flowers with my ScanNCut using a pattern that I designed myself and coloured them using Spectrum Noir alcohol markers, before layering them together. The leaves came from another die set. I also used some Katy Sue Flower Soft for the flower centres.
I gave the padlock die cut the same treatment as the hanging heart in that I layered up several die cuts - 5 from plain white card and one from gold mirror card - to get some dimension. I then went over the front and sides with copper gilding wax to take away the white edges.
The lettering was die cut using Sizzix Brush Alphabet dies and then I added a few freehand hearts to finish it all off. I decided to go with French as it was a present for my (French) friend's mother. To finish it off I used some thick string, which gave it a bit of a rustic feel.
In case you're interested in any of the supplies that I used:
This post contains some affiliate links (denoted by *).
There are so many great font and graphic freebies to be found on the web. If you're into digital crafting or creating digital art then these free resources are worth seeking out. Most come with commercial licences so that you can create products to sell, whether they be print-on-demand patterns and designs or to create physical craft products, but be quick as they are generally only available for a limited time.
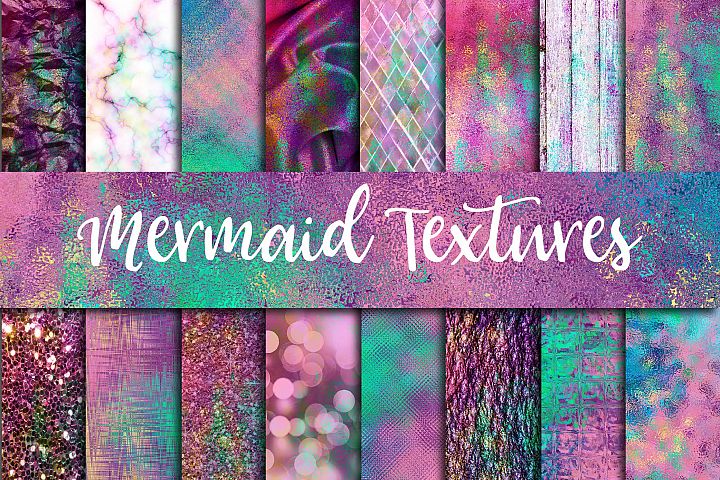
Over at designbundles.net the freebie of the week is a gorgeous set of 16 Mermaid Texture Digital Papers.The colours are a deliciosus combination of shimmering purples, pinks, turquoise and blue.
Next, CACTUS PARADISE vector set on PIXELSURPLUS. A set of 30 vector cactus illustrations and 2 seamless patterns (email sign-up required to download).
The Nordic-style NORTHERN WOODLAND ANIMALS* set on Creative Fabrica is so cute! Consisting of 14 vector animals, 30 vector landscape elements, a wreath, a landscape and a seamless border, the set definitely reminds me of Christmas, but could definitely embody any occasion or time of year by adjusting the colours.
I used the free set to create an A6 card front, which would be perfect for Mother's Day which is right around the corner. I created two versions - one with the sentiment "With Love" and one with no sentiment so that you can add your own touch with stamps, a die cut or whatever you fancy. There is also an extra sheet of flowers with the bouquet separated into layers so that you could decoupage them if you wanted to.
To access the printables simply click on the images below.
I've been coveting the Tattered Lace Glamour Puss die that came with one of their magazines ever since I first saw it. I finally caved in and picked up a back issue from eBay a couple of months ago. Inspired by one of the sample cards on the Tattered Lace website I made this:
Isn't she fabulous?! The stairway die is also by Tattered Lace, from the Essentials collection. I used plain white card and coloured the vertical faces of the steps using a Spectrum Noir light grey marker.
The Glamour Puss die itself cuts out all the detail in the dress, but I wanted to keep it in so I taped across the back of the die cut before removing it from the die. I used a black Spectrum Noir marker to colour the dress then went over it with Dovecraft Crystal glitter glue. The black highlighted all the green elements in the glitter glue, giving the dress a beautiful emerald shimmer.
I used a gold pen to highlight her jewellery and gave her some hot red lipstick, black hair and a matching clutch bag.
The wallpaper is damask patterned paper. Next time I would use a paper with a smaller pattern, but overall I like the effect.