In case you've never heard of it, Izink Diamond Paint is a glitter paste and paint in one. Although you can apply it with a paintbrush it wouldn't really work for painting fine details. It would work really well with stencils though. I love that it is super sparkly and that the paint is not too wet like a lot of other glitter paints/glues. I've purposely left the stripes and spots a little bit rough but it's up to you how neat and tidy they are.
The Vanilla Blossom Watercolor set has a number of elements including florals, foliage, butterflies and birds. One of the florals had three complementary images that would work as decoupage.
I filled an A4 sheet with the various images that I wanted to use and printed that out. If you're going to try to decoupage remember to group all of the relevant images and resize them together.
I'm using sentiment strips that I created myself. Check out this blog post to see how I made them.
Card 1
- Paint horizontal stripes across the card front and allow to dry.
- Cut out the three different floral images (flower with stem, flower with no stem and flower on its own).
- Layer the floral images using foam pads to create a 3D decoupage effect.
- Glue the decoupaged flower to the front of the card and add a sentiment.
Card 2
- Paint horizontal stripes across the card front and allow to dry.
- Cut out one each of the flower with stem, and the flower on its own and stick them together with foam pads.
- Rotate the card to landscape orientation so that the fold is at the top.
- Glue the floral to the left-hand side of the card front and add a sentiment.
Card 3
- Use a saucer, bowl or similar to paint curved stripes across the card front and allow to dry.
- Cut one each of the flower with stem, flower and leaves with no stem, flower on its own and a butterfly.
- Layer the flowers with foam pads and glue it in the bottom right corner of the card front.
- Glue the butterfly in the top left corner (ish) and add a sentiment.
Card 4
- Paint rough circles about 1.5cm / ⅝ inch onto the card front and leave to dry.
- Cut out two of the flower with leaves, one flower on its own and a butterfly.
- Decoupage one of the flowers with leaves and the flower on its own with foam pads.
- Arrange the flowers toward the centre of the card and glue them down.
- Add a butterfly (I chose the top left corner) and add a sentiment.
Use a black card blank for an alternative look.
I really like the gold, but the diamond paint comes in a few different colours so it could be fun to try out different card and paint combinations as well as different florals, or even multicoloured glitter paint backgrounds.
I don't really do Halloween, but the kids enjoy it and so I thought that it would be nice for them to have some Halloween decorations this year. Even though I've had the Enchanted Forest Bundle from CraftBundles.com for a while, I'm still working my way through it. One of the collections within the big Bundle is Enchanted Spiders, which I had completely forgotten about. But then my friend asked me to create a poster for her kid's school's Halloween disco and that's when I rediscovered it.
There are a few files that I thought would lend themselves perfectly to being made into tea light covers. One of the designs worked straight out of the box so to speak, but the others needed some adjustments (which I did in Canvas Workspace) to make it easier for the panels to be stuck together. I added vellum to the backs of each panel.
I resized this one so that it was about 10cm (4in) wide and then cut four. Then I folded the decorative elements over and glued each panel together at those points to create the tea light cover.
This one is similar, but I had to modify the spider and web so that there were no gaps between the elements and the panel could be lifted off the mat in one piece. That was fairly easily done in Canvas.
For these I simply welded a rectangular strip to both the left and right sides of the panel in Canvas to act as the adhesion point. I really like the way the branches stick out in the first set.
Unfortunately I couldn't find my LED tea lights :( so I couldn't photograph them in action, but I'm pretty sure that they'll look great.
As an added bonus, I was able to make use of the waste as well by sticking double-sided tape to card and using that to lift the waste off the cutting mat. I then sprinkled silver and gold glitter over the surface. The results could be used as toppers on greetings cards or on bunting or garlands or for other decorations.
Lantern "waste".
(I just couldn't capture it here, but they really sparkle in real life.)
These are only a handful of the 46 images in the Enchanted Spiders collection, which means plenty more choice to play around with. And with 280 images in the whole bundle covering birds, butterflies, bears, deer, foxes, fairies and unicorns there really are a multitude of options and possibilities. At only $9 including a full commercial licence it's a crazy bargain! Get the bundle here.
*This post contains affiliate links. If you click on the link and make a purchase later I will receive a commission at no extra cost to you. However I bought and paid for this bundle myself and I'm recommending it because I really like it.
I love Christmas decorations and in an ideal world every room in the house would be festooned to bursting point. In reality though, every year the living room looks beautifully festive but the decoration of the rest of the house is sporadic at best. So I vow to craft up a storm for next Christmas, but it always seems to creep up on me! You know, it's ages away, it's ages away. it's ages away, oh shit it's here! It's like that scene out of Monty Python's The Holy Grail (but without the carnage 😂!) You'd think by now I'd be better prepared... So in my attempt to boost the decorations stash I have made a few things, including this indoor wreath. I will be attaching one to every internal door in the house. I cut a ring from Kraft card with a 15cm outer diameter. I then lined it with pine sprigs that I die cut (I don't know the brand) from green paper. I then die cut holly leaves from two shades of green mirror card using the holly dies in the Tattered Lace Holly & Robin set. Finally I cut several poinsettias using two sizes from the Tattered Lace Poinsettia 2016 set to place over the leaves around the frame. The wreath is finished off with a red bow at the top and a loop of red ribbon for hanging glued to the back. As I cut the holly from green mirror card, I went back over all of the berries with red glitter glue.
In our house the decorations go up on the 1st December. That's only a couple of days away so I won't have a full complement of decorations in time for that, BUT technically I've got until Christmas Day so I'll keep making them and adding them up until then.
I've been coveting the Tattered Lace Glamour Puss die that came with one of their magazines ever since I first saw it. I finally caved in and picked up a back issue from eBay a couple of months ago. Inspired by one of the sample cards on the Tattered Lace website I made this:
Isn't she fabulous?! The stairway die is also by Tattered Lace, from the Essentials collection. I used plain white card and coloured the vertical faces of the steps using a Spectrum Noir light grey marker.
The Glamour Puss die itself cuts out all the detail in the dress, but I wanted to keep it in so I taped across the back of the die cut before removing it from the die. I used a black Spectrum Noir marker to colour the dress then went over it with Dovecraft Crystal glitter glue. The black highlighted all the green elements in the glitter glue, giving the dress a beautiful emerald shimmer.
I used a gold pen to highlight her jewellery and gave her some hot red lipstick, black hair and a matching clutch bag.
The wallpaper is damask patterned paper. Next time I would use a paper with a smaller pattern, but overall I like the effect.
Watercolouring in card making is everywhere at the moment, so I dug out my set of Reeves Water Soluble Wax Pastels to have a go at creating some simple watercolour style backgrounds. I simply scribbled pastels in similar shades onto a white card blank in vertical, horizontal and diagonal stripes, then used a wet paintbrush to go over the colours and blend them a little.
I used ordinary cardstock for these so the colours did not move as much as if I had used watercolour card, but I quite like that effect. The first butterfly was cut using Sizzix Thinlits die set Butterfly #3. The second used an ArtC stencil with BoBunny glitter pastes. It's much more lovely in real life.
I like the simplicity of these. The watercolour effect is a great backdrop that doesn't really need much else to make an attractive card. This would be a great technique for making men's cards; a bold sentiment and a well-chosen stamped image or die cut would be all you'd need.
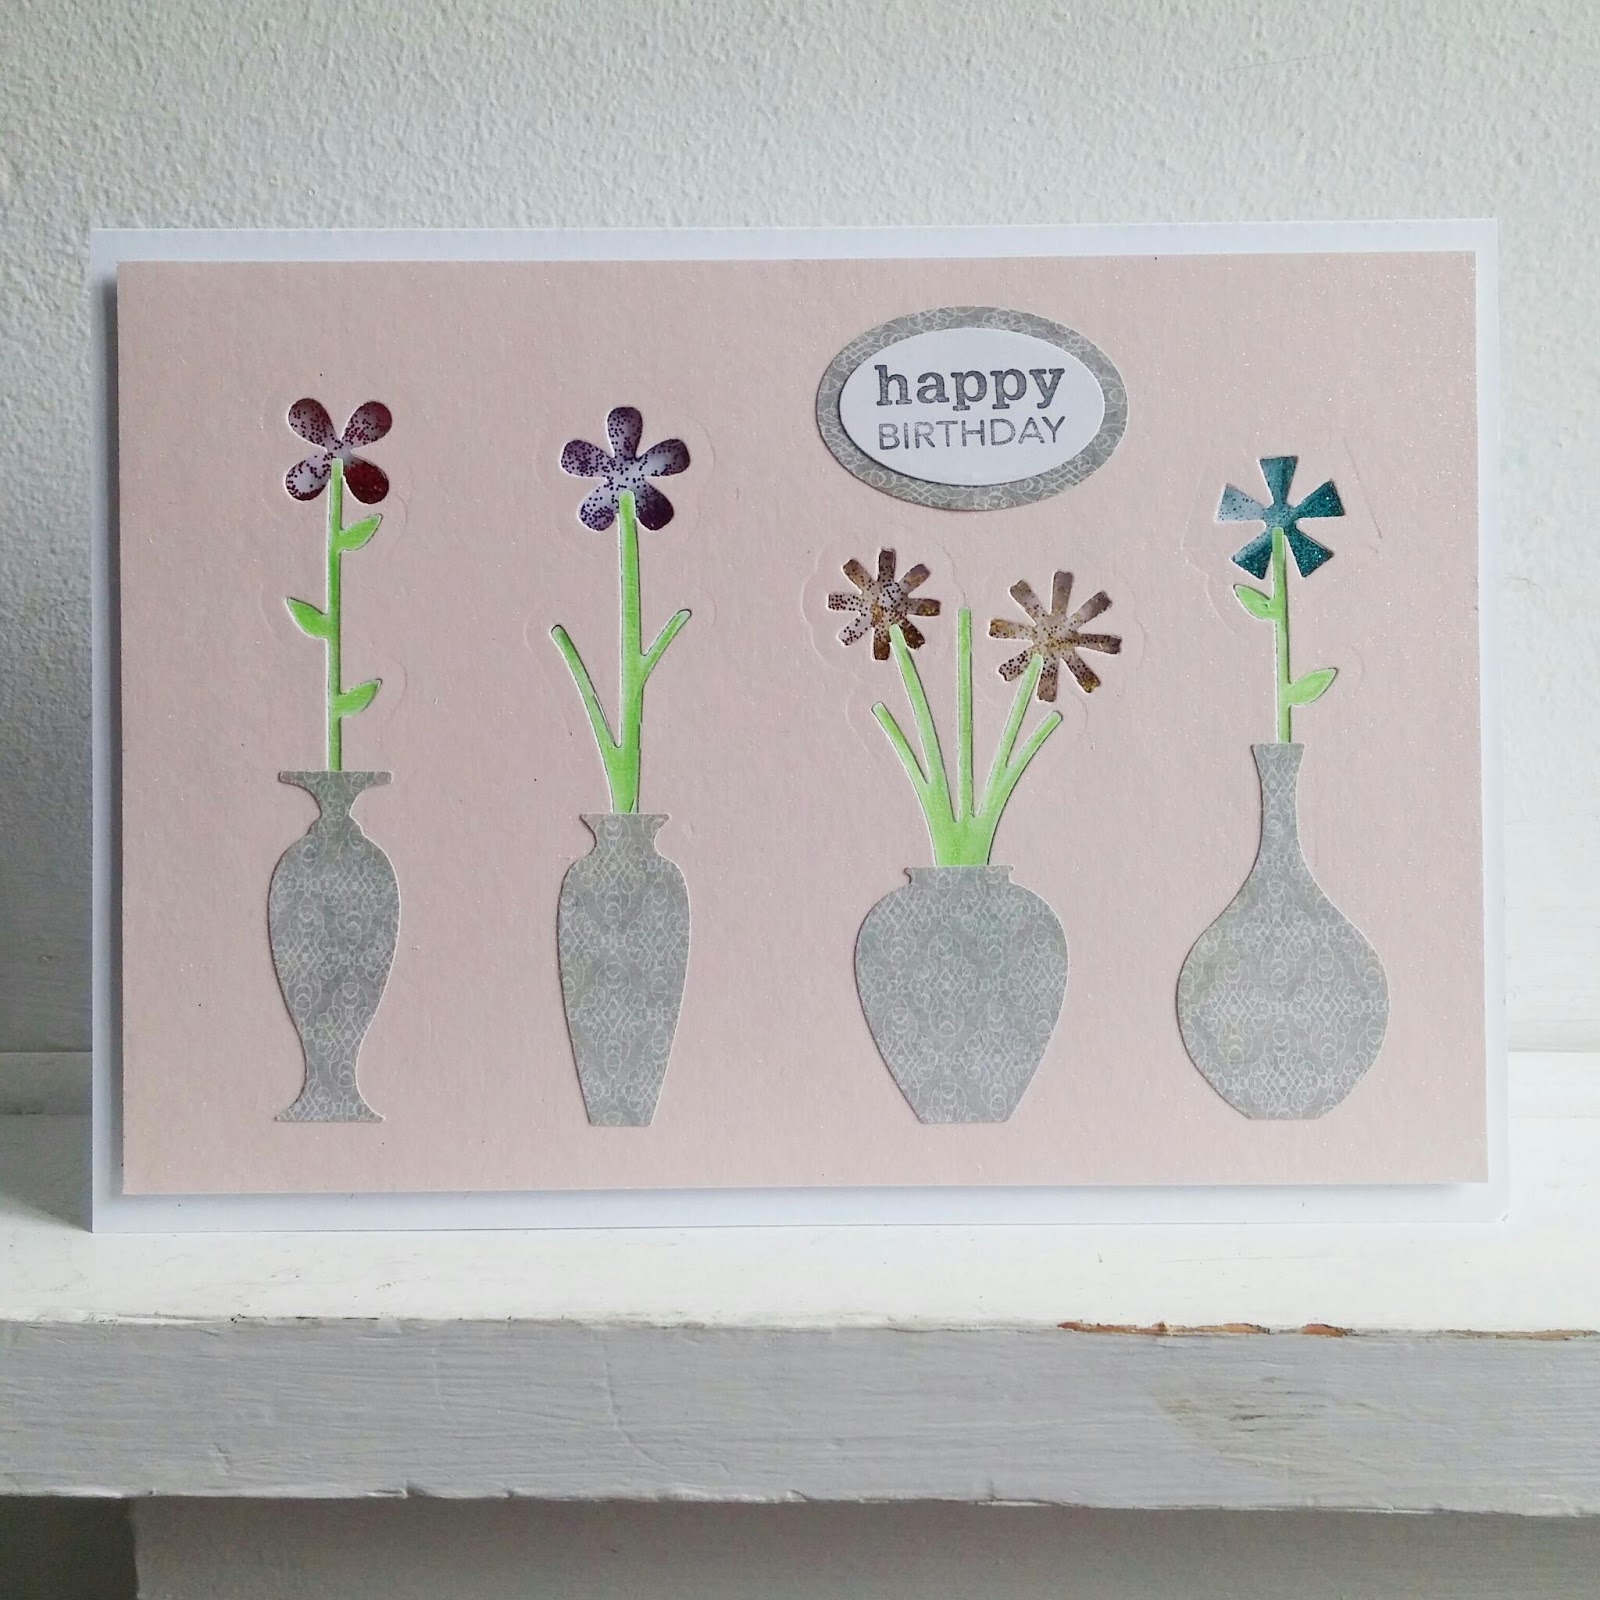
The latest challenge on the AAA Cards blog is to make a CAS shaker card.
I thought it would be fun to use flowers to make the shaker element and I ended up using the Flowers & Vases Thinlits set by Sizzix.
First I cut the stems into some lovely pale pink glitter paper that I recently acquired, then cut the flowers so that they lined up nicely with the stems. I also cut the stems from green paper and paper pieced those back into the pink card, taping them across the back to hold them in place. After making the shaker compartment around the flower heads I filled with different coloured glitters, which I did very messily! It's a good thing that you can't see the back of the card panel. TIP: rather than pouring directly from the glitter pot, use a tool to transfer the glitter. Then I cut the vases from grey patterned paper, stuck them in place and added a simple sentiment framed with the same grey paper to tie it all together. I decided to use the same colour for all the vases because I think that it's more in keeping with the CAS style. And here it is:
It's a shame the photos don't really show the glitter paper. It really is delicious.
It's been a while since I posted and since I entered the Wicked Wednesday ATC challenge. It's good to be back! The theme this time is "Make it Sparkle", and here's what I made:
I started with an ATC base made from an old cereal box, which I covered with patterned paper. I then stamped and die cut the chandelier, and coloured the die cut with a very light off-white, just to soften it a little. I went over the lights with pastel yellow 3D Pearl Effects, and the jewels on the chandelier with silver glitter glue. The chandelier was getting lost against the background so I toned the background down with a little gesso and used foam pads to raise the chandelier. I tried to create a warm glow from the lights with yellow ink on the background. The words were stamped on white card; "shine" was also embossed in gold (although in hindsight maybe I should have used silver to match the rest of the ATC). Glitter glue around "sparkle" and a couple of gems on "shine" finished everything off.