Search This Blog

Showing posts with label watercolours. Show all posts

22 February 2022

Geometric Watercolour Heart - Metallics on Black

In my last post I painted a geometric watercolour heart with metallic watercolours.  I wanted to see what the finished result would look like if I used black card instead of white.  

I used exactly the same method, but as I didn't have black watercolour card I used plain crafting card.  I also decided to stick with purely metallic shades - gold, silver, aztec gold and copper.
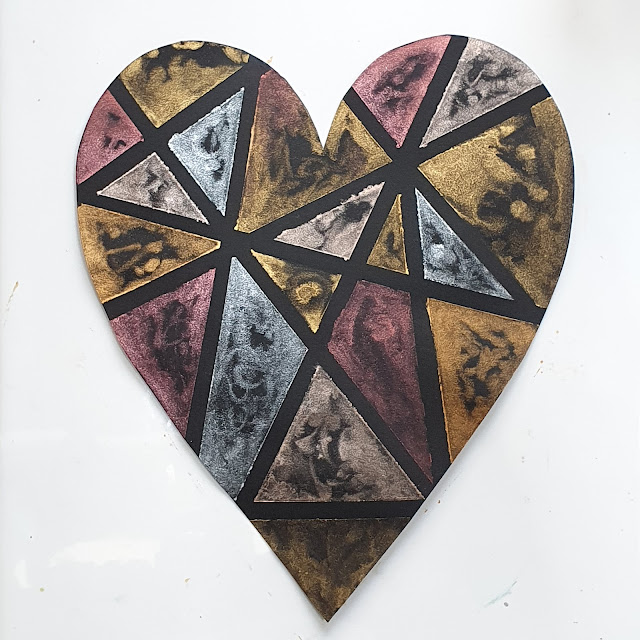

As the card was not watercolour card the paint didn't flow in the same way as it would have with watercolour card.  I'm not sure if I like it 😄.  Perhaps I'd like it more with solid, even coverage 🤷🏾‍♀️.

As the method is exactly the same, take a look at this post for step-by-step instructions.

SUPPLIES

  • Black card (black watercolour card if you can get it)
  • Metallic watercolour paint (I used Arteza metallic watercolours.  At the time of writing they were not available in the UK, but were available in the USA.  For the UK check Craftstash and Cass Art for alternatives).

17 February 2022

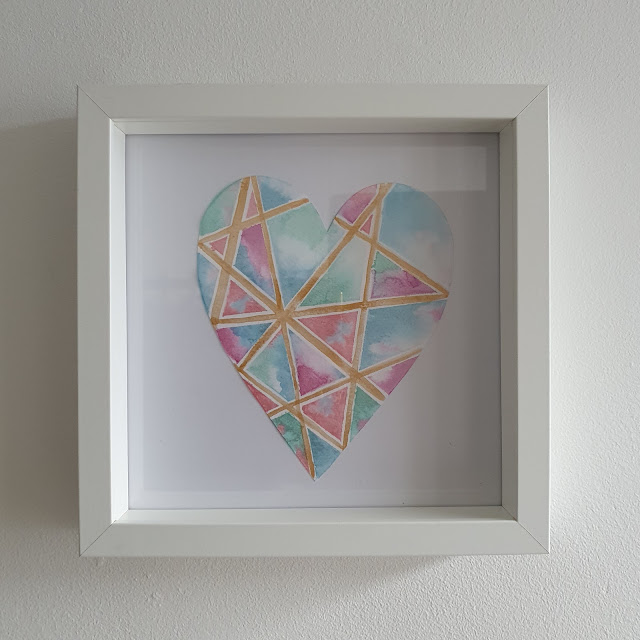
Geometric Watercolour Heart

14 days of hearts - no. 4

My ScanNCut is being tempremental so I've forgone any cutting for today's heart.  I've pulled out my Arteza metallic watercolour paints to create this pretty geometric heart.  The colours I used were Cactus Green, Sky Blue, Plum Purple and Watermelon Pink.


  • Cut a heart from watercolour card.
  • Cut lengths of masking tape into thin strips.
  • Arrange the strips onto the watercolour card to create a geometric pattern
  • Wet the entire surface of the heart.
  • Drop colour into the sections allowing the colour to flow.  You might need to re-wet the surface if sections have dried.
  • For more of a watercolour effect don't completely cover the sections with paint.  You can also add more than one colour to a section and let them blend together.
  • Let the paint dry (use a heat tool to speed up the process).
  • Carefully remove the tape.
  • You could leave the heart at this point, but if you like, paint over the newly revealed white channels with gold paint.
  • Let the paint dry.
  • Place in a frame and hang as wall art.  It would also make a nice gift.


Watch the process video:


SUPPLIES

  • Watercolour card - I used Crafter's Companion 300gsm watercolour card.
  • Metallic watercolour paint - I used Arteza metallic watercolours but these are currently not available in the UK.  At time of writing this they are available in the USA.  Alternatively Altenew also do a metallic watercolour set. Also check Craftstash and Cass Art for alternatives.
  • Masking tape

09 July 2019

Crafting on the Go

We went camping a few weeks ago and I wanted to take something crafty with me; something portable that wouldn't take up too much space.  I found some old card that I had embossed using some Darice embossing folders, which were perfect for colouring in.  Along with my watercolour palette and a water brush I had enough to keep me entertained in a nice, compact package.  This roses image is so pretty and I love the end result.  It would look beautiful on the front of a card, or simply displayed in a frame as a piece of art.


16 February 2018

Cocktails by Moonlight

When the Tattered Lace Art Deco Classics range came out I fell in love with the ladies in the Art Deco Cocktail Hour set.  I really like the seated lady and I had recently downloaded a set of space watercolour backgrounds from Creative Market (free download of the week at the time, currently 50% off) which made me think of having her sitting in the moon sipping her cocktail. A few gems and some small fabric stars completed the overall effect.  


This post does not contain affiliate links. 

04 March 2017

Easy Watercolour Backgrounds

Watercolouring in card making is everywhere at the moment, so I dug out my set of Reeves Water Soluble Wax Pastels to have a go at creating some simple watercolour style backgrounds.  I simply scribbled pastels in similar shades onto a white card blank in vertical, horizontal and diagonal stripes, then used a wet paintbrush to go over the colours and blend them a little.

Hello Greetings Card - ombre watercolour background

Have a Beautiful Day greetings card - watercolour background with glitter blutterfly
I used ordinary cardstock for these so the colours did not move as much as if I had used watercolour card, but I quite like that effect.  The first butterfly was cut using Sizzix Thinlits die set Butterfly #3.  The second used an ArtC stencil with BoBunny glitter pastes.  It's much more lovely in real life.

I like the simplicity of these.  The watercolour effect is a great backdrop that doesn't really need much else to make an attractive card.  This would be a great technique for making men's cards; a bold sentiment and a well-chosen stamped image or die cut would be all you'd need.

09 June 2015

Eat, Drink and be Merry ATC

The theme over at Wicked Wednesday ATC Challenge this week is "Picnic or Food/Drink".  This is my entry:


I went with a picnic scene.  I started with a piece of watercolour card, and added a rough band of blue and green using my new water-soluble wax pastels.  I then created the corner of a picnic blanket with Washi tape and stuck on small food motifs that I had cut from various patterned papers that I have.  Finally I stamped the sentiment "Eat, drink & be merry!".   Quick and easy this week.

20 May 2015

Spread Your Wings and Fly

The challenge this week on the Simon Says Stamp Wednesday Challenge is to use an inspiration colour swatch.


Isn't it delicious?  This combination of colours seems to be really popular at the moment, and rightly so because it's lovely.

Whenever I use paints, if there is any left over I brush it over watercolour paper to make backgrounds for future use.  It just so happens that some of the backgrounds matched this swatch beautifully.  So I stuck two of the watercoloured panels to a card front.  I recently bought a new stamp  - a butterfly surrounded by the words "Spread your wings and fly" and added small butterflies from the Hot Off The Press "Dressform" mini stamp set.  I added some gems in teal and light blue as butterfly trails, and then added a sentiment to the top left corner.  The edges are inked with a light pink pigment ink.