- Simply paint the wood slice with acrylic paint and leave to dry.
- Choose a stencil and then apply the glitter paint through it.
- Carefully lift off the stencil and allow the glitter paint to dry.
- Done!
01 November 2022
Spooky Faces Wood Slice Ornaments
25 October 2022
Spiderweb Hanging Decoration
If you've read my blog before you'll know that I am the QUEEN of last minute 👑! My youngest has been begging me to decorate for Halloween and I've been putting it off. But with only a handful of days to go I'm going to have to go into Halloween crafting overdrive in order to keep my promise.
So for the first decoration I went back to The Enchanted Forest Bundle from craftbundles.com (I wrote about it here). It has a few different mini bundles consisting of different forest animals, including spiders! I chose the design that looks like a hanging cobweb with spider attached.
I cut 6 of that design from black card using my ScanNCut, then glued them together back to back. Don't make the same mistake I did! Layer them one of top of another without flipping the stack over. I did not do that and ended up in a bit of a pickle! But the end result was still very effective.
I used a Spectrum Noir clear sparkle pen to roughly coat the web portions and give them a subtle glittery shimmer. There were also some round nodule types of things in the design, to which I added 6mm acrylic gems in purple, lime green and orange. I could probably have used larger gems (up tp 10mm), but I only had the 6mm size in those colours. The final touch was to add some metallic thread to the hanging loop and then hang it up.
Watch the process video:
20 July 2022
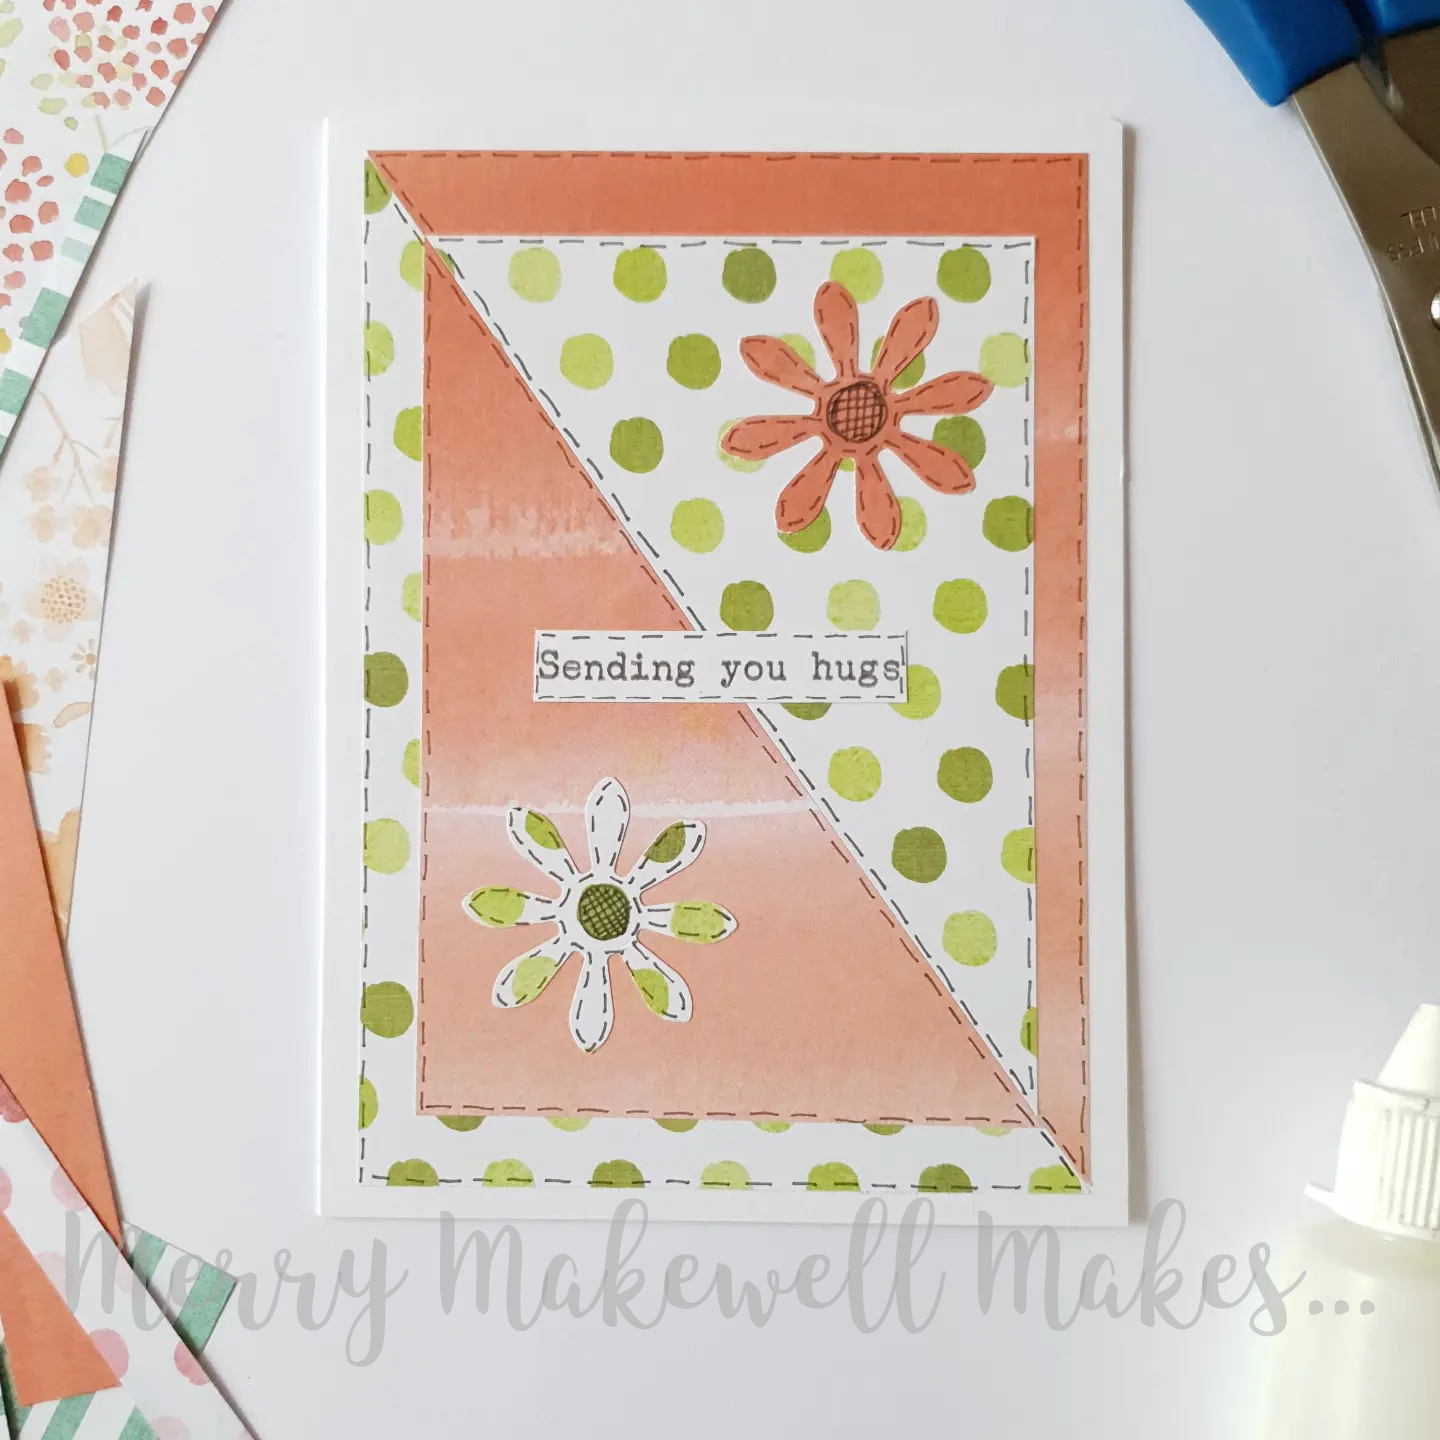
Patchwork Cards 1 - Half-Rectangle Triangles
- Trim an A6 card base to 14.5cm (i.e. 10.5 x 14.5cm). (This step is optional. I like to do it because it makes the borders around the patterned papers equal.)
- Cut two rectangles each measuring 9.5 x 13.5 cm and 7.5 x 11.5cm from two contrasting patterned papers. You should have four rectangles in total.
- Cut each of the rectangles in half across the diagonal. (If you have half-rectangle triangle dies you can just cut the triangles directly.) Make sure to cut in the same direction on all four of the rectangles. You should now have four large triangles and four smaller triangles (two each in two patterned papers).
- Position one of the large triangles in one corner of the card base, leaving an even border around the top and side. Take one of the large triangles with a different pattern and position it in the opposite corner of the card base.
- Place a smaller triangle in the middle of a larger triangle so that you have two different patterned papers on top of each other.
- Use a (black) fineliner to add faux stitching around all the edges.
- Cut two flowers (or other shape) - one from each patterned paper and add faux stitching all around the edges.
- Glue the flowers (or other shape) towards the right-angled corner of the smaller triangles. You can shape the flowers and only stick down the centres or you can glue them down flat. It's up to you!
- Add a sentiment at the centre.
![]() |
| Variation 1 - Smaller triangles meeting at the centre diagonal. Also flowers are stuck down flat (more like applique). |
![]() |
| Variation 2 - Card in landscape orientation and the corners of the smaller triangles are aligned with the corners of the larger triangles. Also no faux stitching. |
![]() |
| Variation 3 - Square card base, smaller triangles meeting along the diagonal (as in variation 1) and alternative faux stitch pattern on the flowers. |
![]() |
| Variation 4 - Square card base, smaller triangles meeting along the diagonal and alternative shape used for the embellishment. |
- A6 card blank
- Two types of patterned paper in contrasting colours.
- Scissors / Trimmer / Guillotine
- Glue
- (Black) Fineliner pen <0.3mm
22 June 2022
Metamorphosis - Junk Mail to Art Journal
You know those little booklets that you sometimes get in the post? The mini supermarket catalogues, or the insurance policy booklet that you'll never look at again? Well, I've been keeping a few aside with the intention of turning them into art journals.
I started with the cover and I love how it turned out!
- To start I put down a layer of Pearl Diamond White acrylic paint.
- It was quite transparent so I went over it roughly with Titanium White acrylic paint, leaving some areas of the pearl white exposed.
- When it was dry I added patches of Mermaid Lagoon and Ripe Persimmon Distress Stain, and Turquoise iridescent acrylic paint, which I blended out with a brush.
- I stamped small circles of various sizes and with various line patterns in teal ink in a cluster toward the bottom left and top right of the page.
- Then I used a paisley and script stamp with black ink to add some additional texture to the background. To avoid a really bold stamp I used second and third generation stamping.
- I added gold glitter paste through a stencil with small circles randomly across the page.
- For the focal point I chose a printout of a turquoise butterfly that I thought matched the background a bit. The image had gold areas, which I went over with gold glitter glue for added interest.
- I placed the butterfly at the centre and traced around it with a black gel pen. I then used a damp brush to soften the outline - making it more of a shadow.
- I stamped the word "metamorphosis" onto plain white card, cut it out and then positioned it in the bottom right corner of the page.
- And that was the page done!
The underlying print adds some extra interest to the page. The paint layers are not completely opaque so although you can't see it clearly, the light and dark areas of the original print do show through in places.
I thought that the phrase "metamorphosis" was very apt as it not only described the process by which a caterpillar turns into a butterfly, but also the transformation of the booklet into an art journal.
So next time you get a junk booklet in the mail, don't throw it out. Turn it into an art journal instead!
SUPPLIES
- Junk mail booklet
- Arteza Pearl Diamond White Craft Acrylic Paint
- Titanium White Acrylic Paint
- Mermaid Lagoon Distress Stain
- Ripe Persimmon Distress Stain
- Arteza Groovy Turquoise Iridescent Acrylic Paint
- Circle, Paisley and Script stamps
- Papermania Dye Ink - Teal
- Papermania Dye Ink - Black
- Butterfly Clipart pack (download)
- Arteza Black Glitter Gel Pen
- Mini alphabet stamp set
- Aladine Izink Diamond Paint - Gold
31 May 2022
Stay Wild Hanging Heart
Earlier this year I downloaded the Copper Tiger digital paper set by Digital Curio (via Creative Fabrica).
I plan to do a series of tiger-themed crafts throughout the year to celebrate the Year of the Tiger. I finally sat down a couple of weeks ago to make this hanging heart idea that I had.
I have used the paper set exclusively. The only extras I used were the gem for the flower centres and the letter dies that I used to make the words. You could also use a digital cutting machine to cut the letters. Apart from the slightly wonky lady, I really like how it turned out ☺.
PROCESS
- Prepare the heart base. I used 4 layers cut from old cereal boxes and glued together.
- Choose one of the papers for the background. Print it out and trace around the heart base, then cut it out and glue onto the heart.
- Go around the edge of the heart with a sanding block (optional).
- Print out a couple of the leafy papers and fussy cut a variety of leaves. I cut nine leaves.
- Print out the art deco style black and gold paper and cut 5 of the fan shapes.
- Print the lady and the sitting tiger clip art making sure to resize them to match the size of the heart base and cut them out.
- Use the uppercase die set to cut the letters S, T, A, Y from the copper textured paper.
- Use the lowercase die set to cut the letters w, i, l, d, from one of the tiger skin paper.
- Position the lady and the tiger towards the centre of the heart. It doesn't matter if the tiger overhangs the edge a little bit.
- Position the lettering in the top right of the heart.
- Add one of the smaller leaves underneath the words as a flourish.
- In the top left corner use the art deco style elements to create a flower. Glue them down around a central point leaving the edges free.
- Add a gem in a coordinating colour to the centre of the flower you created.
- Arrange a few of the leaves around the flower, slotting them in behind the petals.
- Add some string or other fixing method to the back of the heart.
SUPPLIES
- Heart base.
- 10mm acrylic gem
- Copper Tiger Digital paper set
- Altenew Fine Alphabet Die Set
- Sizzix Brush Lowercase alphabet
18 March 2022
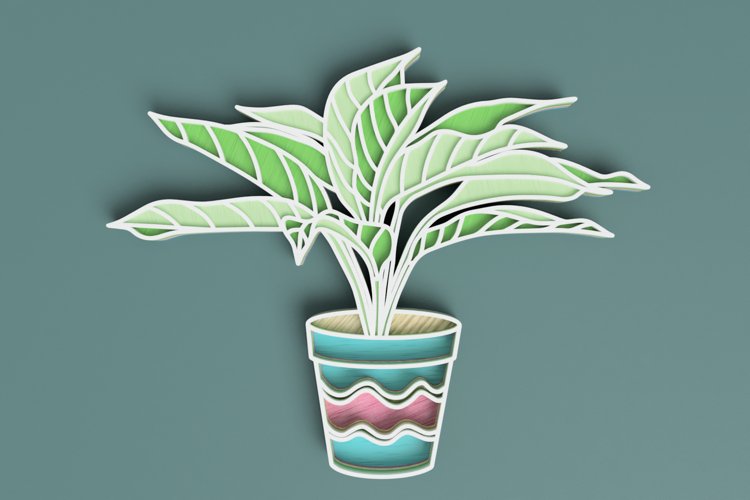
Friday Favourites - House Plant Laser Cut Files
23 February 2022
Heart Flower Collage
14 days of hearts - no. 6
I had some background papers leftover from this project so I decided to make something similar, but on a heart base. I used a 100mm canvas board heart that I had lying around, but you could use any other type of heart substrate or glue several die cut hearts together to make a strong base.
PROCESS
- Cover the heart in glue and then add strips of old book pages or newsprint background paper making sure to glue down any overlapping edges.
- When dry paint lightly over the surface with white acrylic paint using a dry brush. The aim is to soften the appearance of the text, but not to completely obscure it.
- Using a dry brush again, paint around the edge of the heart with black paint.
- Cut about 16 pointed ovals (petals), each about 1-inch long, from coloured patterned paper.
- Use a hole punch or cut a small circle from scrap card.
- Glue the (petals) around the circle to create a flower shape.
- Cut several smaller petals from the same coloured patterned paper and glue those around the centre of the flower.
- Add additional petals in the gaps between petals (optional) to fill out the flower.
- For the stamens cut thin strips about 1/2 inch long from yellow patterned paper.
- Glue them around the centre of the flower (tweezers would be very useful here!).
- Use a hole punch or cut a small circle from the yellow patterned paper and glue that to the very centre of the flower.
- Glue the completed flower to the canvas base.
- Cut 3 leaf shapes about 1 1/2 inches long from green patterned paper and slot them in behind the flower.
SUPPLIES:
- Heart base
- Old book pages or newsprint patterned paper. I used the Old Newspaper Textures digital paper set.
- White and black acrylic paint
- Coloured patterned paper. I used:
- Scattered Gold Shimmers in Green
- Pattys Desert Strips 3 Bundle (sample freebie) [blue-purple paper]
- Glitter Digital Papers [including yellow paper]
.jpg)