Search This Blog

03 May 2016

AAA Cards Game #63 - CAS Shaker

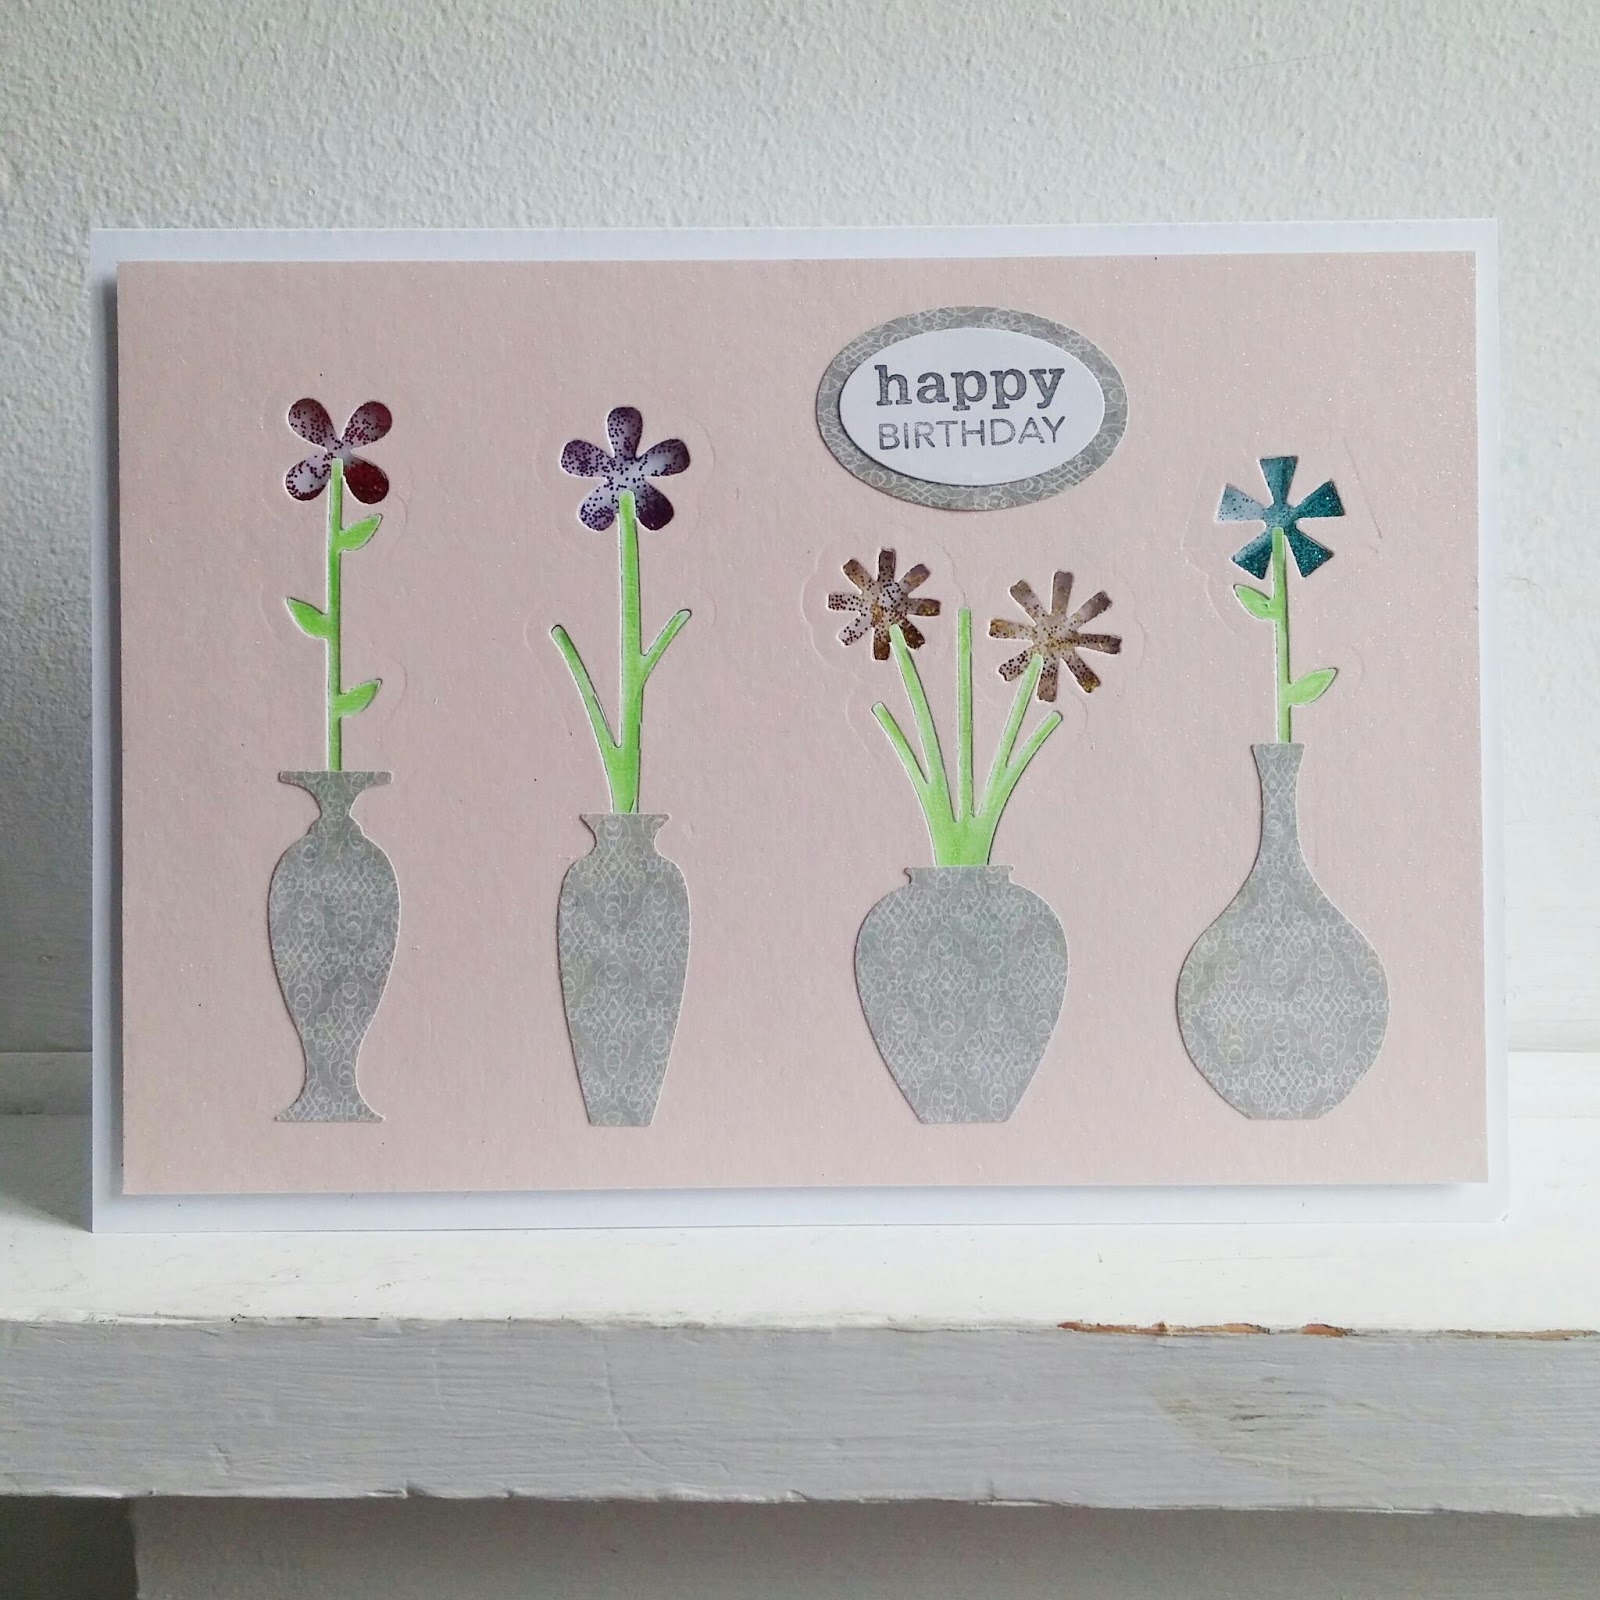
The latest challenge on the AAA Cards blog is to make a CAS shaker card.


I thought it would be fun to use flowers to make the shaker element and I ended up using the Flowers & Vases Thinlits set by Sizzix.

First I cut the stems into some lovely pale pink glitter paper that I recently acquired, then cut the flowers so that they lined up nicely with the stems. I also cut the stems from green paper and paper pieced those back into the pink card, taping them across the back to hold them in place.  After making the shaker compartment around the flower heads I filled with different coloured glitters, which I did very messily! It's a good thing that you can't see the back of the card panel.  TIP: rather than pouring directly from the glitter pot, use a tool to transfer the glitter. Then I cut the vases from grey patterned paper, stuck them in place and added a simple sentiment framed with the same grey paper to tie it all together.  I decided to use the same colour for all the vases because I think that it's more in keeping with the CAS style.  And here it is:

It's a shame the photos don't really show the glitter paper.  It really is delicious.  


27 April 2016

Perching Bird - Free Book Folding Pattern

I first came across book folding a few months ago and although some of the designs looked good, I wasn't really inspired by it.  Then recently I found a website where you could create your own patterns and as I love to do my own thing, I decided to have a go.

Using one of the punches in CraftArtist 2 Professional, I generated the following image, which I then converted into a book folding pattern with the help of the online software.


And here's the finished item:


I'm really pleased with how it turned out, especially as a first attempt. Needless to say I've generated quite a few more patterns, which I hope to be able to share soon.  In the meantime download the Perching Bird book fold pattern here.

12 April 2016

CAS Sympathy Card

Sadly, I've had to make a couple of sympathy cards recently.  I've never made one before but I wanted them to be simple and tasteful.  After poring over my stamps for ages, I finally decided to use a die cut and chose the English Rose die by Tattered Lace.


I used linen-textured card for the card blank to add a little bit of interest without domineering the card and then used the die to cut the rose design from plain white card, which I went over a couple times with a clear Spectrum Sparkle pen. This gave a nice, subtle sheen that added some interest to the die cut.  I also had some My Craft Studio sentiment strips that I bought a long time ago and promptly forgot, so I chose the "With Sympathy" sentiment and cut a strip the same width as the card blank.  The die cut was glued in the centre of the card, with the sentiment strip below.  The card was finished off with three aurora borealis-style sequins, which are clear but have a pink or slightly green tinge depending on how they catch the light.

30 March 2016

Washi Tape Banner Card

I've amassed so many supplies, but hardly use any of them, including my collection of Washi Tape, so I decided to make a Washi tape card.


I placed strips of Washi tape vertically from the top right corner of the card blank and cut the ends to look like banners. After that I stalled! I couldn't think of how to finish the card. I tried a horizontal layered banner across the bottom, but the layout was really lacking something.  Then I remembered my new Tattered Lace Melded Backgrounds dies and that made all the difference. 

Tattered Lace Melded Backgrounds die set

 I cut the diamond pattern into the bottom left corner and added a pink insert into the card, which really made the pattern pop. I then placed the layered banner back over the top and finished it off with a die cut "Wonderful" (the waste from another die) and a small flower.

It's great how a small feature can really take a card from drab to fab!


12 February 2016

The Paper Players #281 - Cats and Dogs

This week on The Paper Players the theme is "Raining Cats & Dogs" - use a cat or dog on your card.


I've put together another digital creation:


I love CraftArtist.  It's such a powerful program considering that it was designed for hobby crafters and scrapbookers.  I didn't have any actual images of cats or dogs, but there are some animal punches that come with the program so I punched out the cats and dogs from various patterned papers and added a black outline to help lift them off the background.  I did the same for the bench.  I really couldn't think of an appropriate sentiment, but it looks like all the animals are hanging out so in the end I went with "Let's Get Together".

09 February 2016

White On White

I'm taking part in the Simply Less Is More challenge, with the theme of 'white on white' this week.

I created my card using a Sheena Douglass embossing folder for the background.  I LOVE that swirly pattern. The die cut is the Love Scroll from the new Tattered Lace Melded collection (more on that soon) which I've highlighted with Dovecraft's Crystal glitter glue.  It has pink and green highlights which was really hard to capture on film, so to speak, but does a great job of lifting the die cut from the background.  I also placed a length of ivory ribbon behind the die cut and a trio of pearls in two corners for added interest.

Do What You Love - Love What You Do


I bought the "Frame & Love Set" embossing folders by Sizzix because I loved this sentiment, but it sat unused for quite a long time because I didn't really know what to do with it.  So I started with the basics - I embossed a piece of coloured card with a white core and sanded the embossing back.  Then I highlighted some of the decoration around the word 'LOVE', that looked a bit like foliage and flower buds, with Flowersoft.  Then I added some butterflies and a punched flower.

The butterflies were from a stamp set by Clearly Besotted, which I coloured with Spectrum Noirs.  To help the colours pop I highlighted some of the detail with a white gel pen.  The wings were curled a bit and then propped up with small foam pads to help make the piece look more dynamic,

I punched two flowers, which I layered up, shaped a bit and then added black beads to the centre.  The leafy vine is a Britannia die, which I really love.

Once done I liked the way it looked, but it needed a mat, so I used bright pink card to echo the colour in the larger butterflies.  I then matted the whole thing onto black mirror card which seemed to tie the whole thing together, as it picked up the back from the butterflies as well as the centre of the flower.  I intend to mount the whole thing on grey board and then hang it up somewhere around my craft space.