Search This Blog

21 September 2014

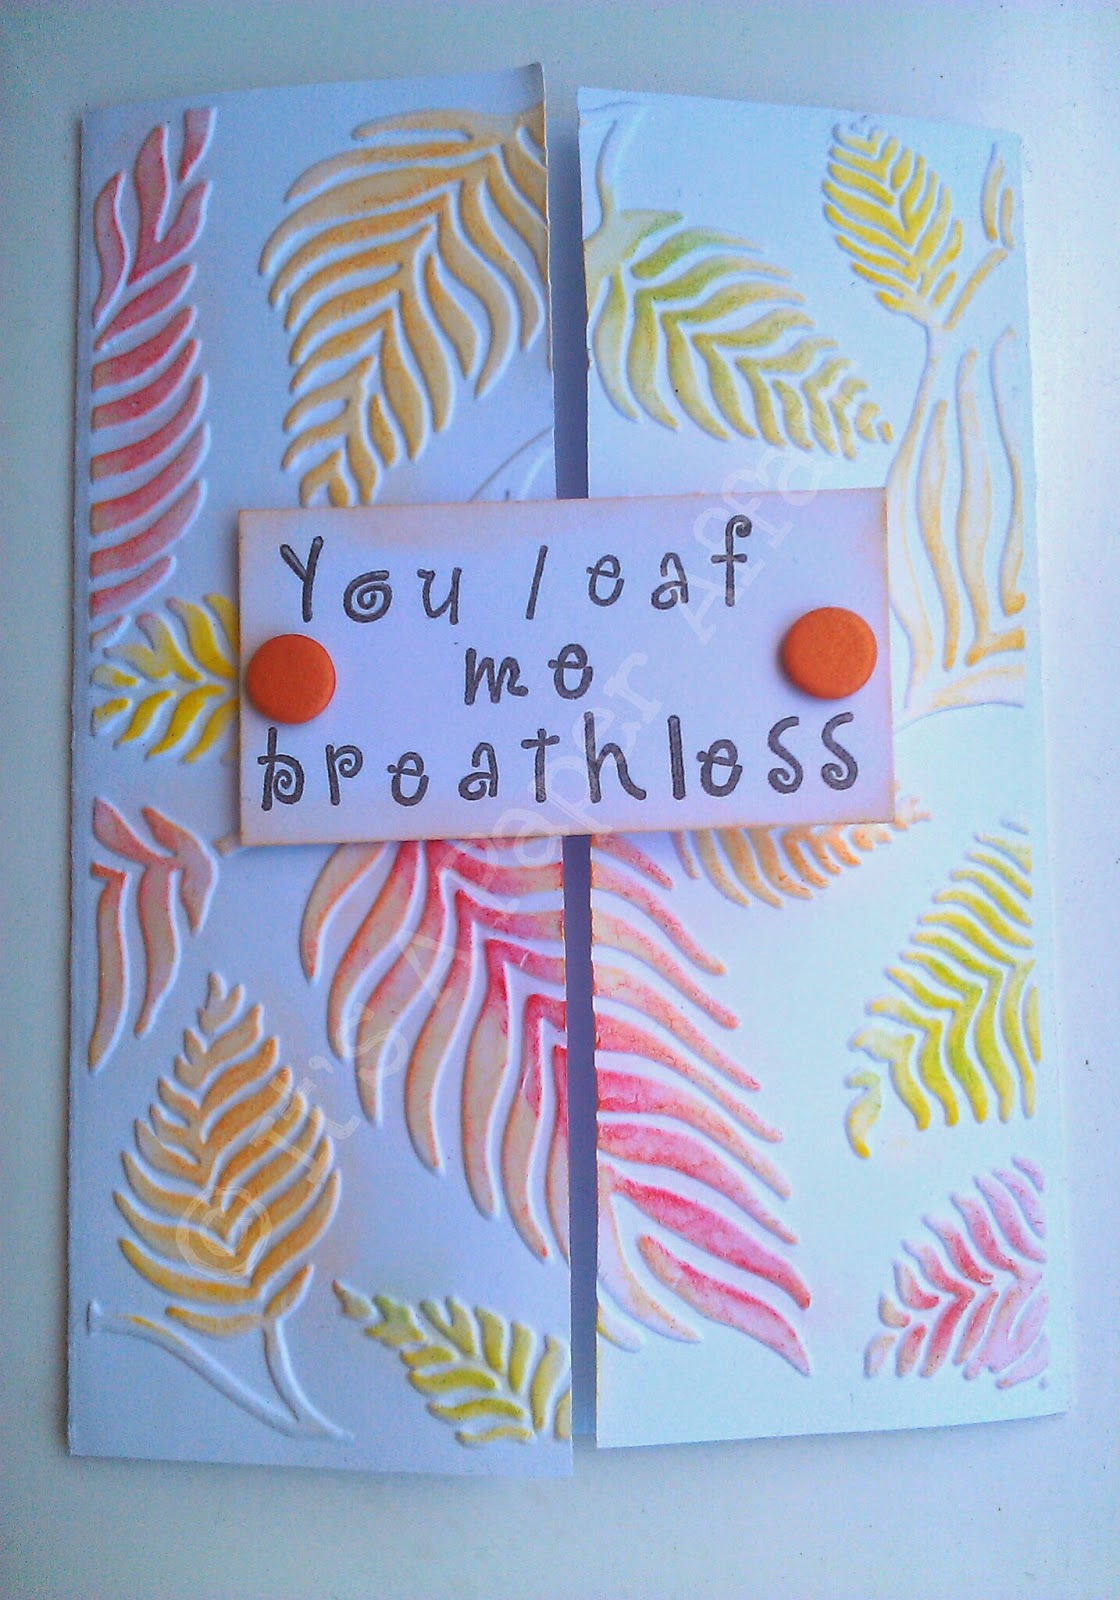
You Leaf Me Breathless


It's the Autumn solstice today so an autumnal-themed card seems appropriate. I've made a gatefold card and used the Sizzix Leaves embossing folder on the two front panels.  I then used pigment ink in red, orange, yellow and green over the embossed detail. The sentiment is stamped on plain white card, then I've gone around the edges with orange ink and finished it off with two pieces of Candi.


20 September 2014

Hummingbird

I made this card for the CAS on Sunday challenge #42 - Sequins Celebration and Crafty Little Fairies - Sparkle and Bling challenges.  I got a set of adorable mini stamps by Hero Arts, including a lovely hummingbird set, which I've used here.  I then painted the hummingbird with mica powders - I love the shimmery effect, although it doesn't really show up very well in the photos. The flower was coloured with watercolour pencils.  


Now, when it comes to stamping and colouring, I'm as fresh as a daisy.  One of the things that I noticed was how the mica powder "paint" partially obscures the black, stamped outline.  If I was going to repeat this card, I think that I would try using an embossing powder, which would then act as a resist and keep the outline crisp and sharp.


I didn't read the challenge properly - I missed the part about "celebration", so I went back sand stamped "Happy Birthday" at the top.  I actually prefer the original version. What about you?


13 September 2014

(Faux) Stitching and Sewing

I made this card for the 4 Crafty Chicks challenge #210. Although I missed the deadline I thought I'd show it anyway.  The brief was Real/Faux Stitching.

A while ago, on a whim, I bought a very discounted We R Memory Keepers Sew Easy with several piercing attachments. I used the crisscross attachment along the left edge, but then I couldn't be bothered to actually sew it, so I did some faux stitching instead.

The dress form stamp was another impulse buy.  I tried to shadow stamp the image in the background, then stamped a clear image on white card, which I cut out and layered right at the centre. 

The sentiment came from a Tilly Daydream paper pack with a stitchy theme. I faux stitched around the edge then made tiny snips all the way around to give the effect of frayed material.

The card looked a little bare so I coloured part of the stamped image and stuck a matching organza ribbon flower on the side. In hindsight I probably should have matched the red from the sentiment instead of using pink.

22 August 2014

Let's Get Digital!


Wow, it's been a while! I'm currently taking a long summer break visiting family abroad so I've had little opportunity for papercrafting what with my entire stash being on a completely different continent!  But then I remembered that although I don't have any physical items, I do have my laptop and Craft Artist. Yay!


I had downloaded some background papers last Christmas, but wasn't really aware of the world of digital crafting until I watched Create and Craft TV a few months ago.  My first CD was "All About Alphabets" by My Craft Studio, which also came with the My Craft Studio Elite program.  That was OK but it wasn't until I discovered Craft Artist 2 Professional and the DaisyTrail.com digikits that I really got into it.

Birthday card I made for my niece
I love Craft Artist.  It's a really powerful program and it's also been really helpful for creating flyers, adverts and the like for my day job. You can download the starter program for free from the DaisyTrail website.  It doesn't have as much functionality as Craft Artist 2 Professional, but it's still pretty nifty.  The full program is around £20 but if you sign up to the newsletter and keep an eye on Create and Craft TV (and are patient) you might be able to grab it for less than a fiver, which is what I did.

I'm still very much a beginner, but the possibilities seem endless.  I can't wait to carry on creating.

30 June 2014

Wallpaper - The New Paper Pad

I love paper pads, but with a 6x6 pad costing roughly £5-£10 and a 12x12 pad at around £15 a time, they can get a little expensive.  One alternative is to go down the digital route, but that has its own hidden costs and limitations.

The other day, while looking for a new mirror at B&M Home Stores I happened to walk down the wallpaper aisle when a few rolls caught my eye.  Among them was this one:


Isn't it lovely? There's 52cm x 10m of paper on this roll, which works out to the equivalent of one 12x12 pad with 32 sheets, and two 6x6 pads each with 32 sheets, and paper left over.  And because it's all a continuous length it can double up as wrapping paper.  All that for only £4.99 - an absolute bargain! Even at £10 or £15 a roll, that's still amazing value.

The only downside might be that it's all the same pattern, whereas a paper pad will generally offer some variety, but if you choose a design with lots of different elements in it, you can make it go a lot further. 

Here are some of my favourite designs that I found on the B&M website:


14 June 2014

CASE Study Challenge #195

This week I'm joining in with the CASE Study Challenge (CASE stands for copy and steal everything, by the way).  This is the design that was set: 


And here's my interpretation:


I used white pigment ink on Kraft card. At first the white really stood out, but as it dried it seemed to fade a little. Maybe the Kraft card soaked it up. So although I like the result, it's not as punchy as I would have liked. 

Then I thought about stamping with acrylic paint instead, to get a bolder finish, so that's what I did here:


The result is definitely bolder, but it has a different look to stamping with ink. This was my first attempt at stamping with acrylic paint. At first I applied the paint directly on to the stamp, but I was a tad heavy-handed and some of the finer detail was lost.  So then I applied the paint onto an acetate sheet and then pressed the stamp into that before stamping on the card.  The result was much better doing it that way.  It's not as crisp as the ink-stamped version, but I think it has its own charm.

Finally, because the white was not very bold, I wanted to do a comparison with black ink, and here it is:


The design definitely stands out more in black, but I'm not sure which version I like the best.  I was thinking that perhaps the black version would make a nice sympathy card if the white mat behind the sentiment was changed to black.  I also thought that another version of the white using embossing powder might be a good way to make the white stamping pop.


I am entering the following challenges:
Moving Along With The Times - Clean and Simple

06 June 2014

Fleather / Faux Leather

Faux Leather from Kraft card

This is my first attempt at making Fleather or Faux Leather using Kraft card.  I first saw the technique demonstrated by Sheena Douglass on Create & Craft TV a few months ago. Since then she's posted a video on You Tube which shows the technique in more detail.

I've been itching to try it for ages, and I finally bought some Kraft card so it was time to give it a go.  I'm really pleased with this first attempt. 

Basic Kraft card on the left, Fleather/faux leather on the right

I used the Far Out Florals embossing folder by Sizzix, and coloured it using metallic copper and orange pigment inks from Hobbycraft.  I think I was too vigorous with rubbing in the water/glycerin because the surface was shedding fibres, and in lieu of spray varnish I used some old clear nail varnish, but the effect is amazing. It really does look and feel like old leather!  I'll definitely be trying this again.